How to use LiteSpeed Cache and Memcached on Lightsail
 Paddy
~ August 29, 2023
Paddy
~ August 29, 2023
In this tutorial, you’ll install WordPress on AWS Lightsail. You’ll then install the LiteSpeed Cache WordPress plugin and configure it to use Memcached, using a Memcached-compliant cache provisioned by MemCachier. By the end of the tutorial, you will have a fully functional WordPress site running on Amazon Lightsail with enhanced performance thanks to the LiteSpeed Cache plugin and Memcached.
Outline
- Prerequisites
- Install WordPress on Amazon Lightsail
- Install the LiteSpeed Cache plugin
- Create a Memcached-compliant cache with MemCachier
- Add a Lightsail firewall rule to allow it to connect to your cache
- Configure LiteSpeed Cache to use MemCachier
- Verify Memcached is working
- Conclusion
- Related Posts
Prerequisites
Before you complete the steps in this tutorial, make sure you have the following:
Install WordPress on Amazon Lightsail
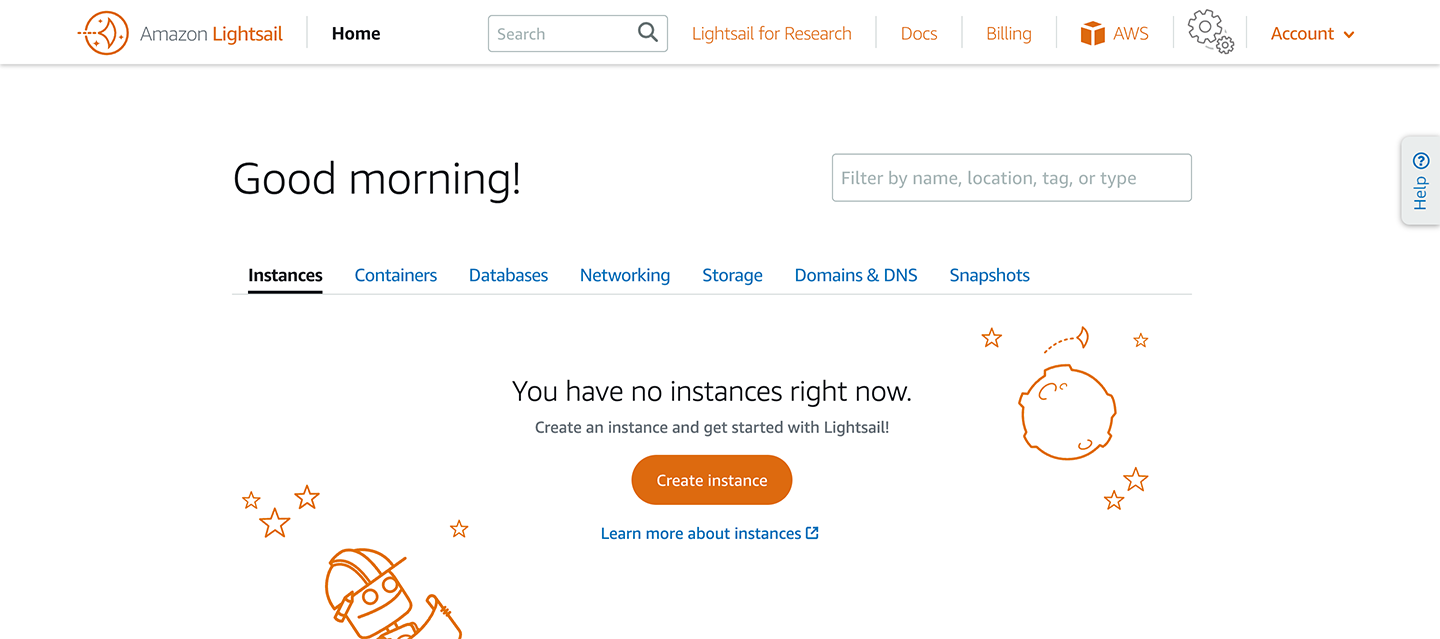
Lightsail is the easiest way to install WordPress on AWS. You’ll have a WordPress website up and running in a few clicks.
Log in to your AWS account and go to the Lightsail dashboard. You can use the search bar at the top of the AWS console to find it.
Next, on the Lightsail dashboard, click Create instance.
On the Create instance page, choose the following options. All of these are currently already the default settings, apart from setting a more descriptive instance name:
- Select your instance location. For this tutorial, I’ll use Virginia (us-east-1) and leave the Availability Zone as the default Zone A (us-east-1a).
- Select Linux/Unix as your platform.
- select WordPress as your blueprint.
- Leave the SSH key pair set to the default SSH key. The default SSH key allows you to use the Lightsail in-browser terminal feature later in this tutorial. You can set your own key pair if you’re familiar with connecting to an EC2 instance via SSH and wish to do so.
- Choose your instance plan next. The most inexpensive plan is more than sufficient for this tutorial.
- Under Identify your instance, enter a name. I’ll be using WordPress-Memcached.
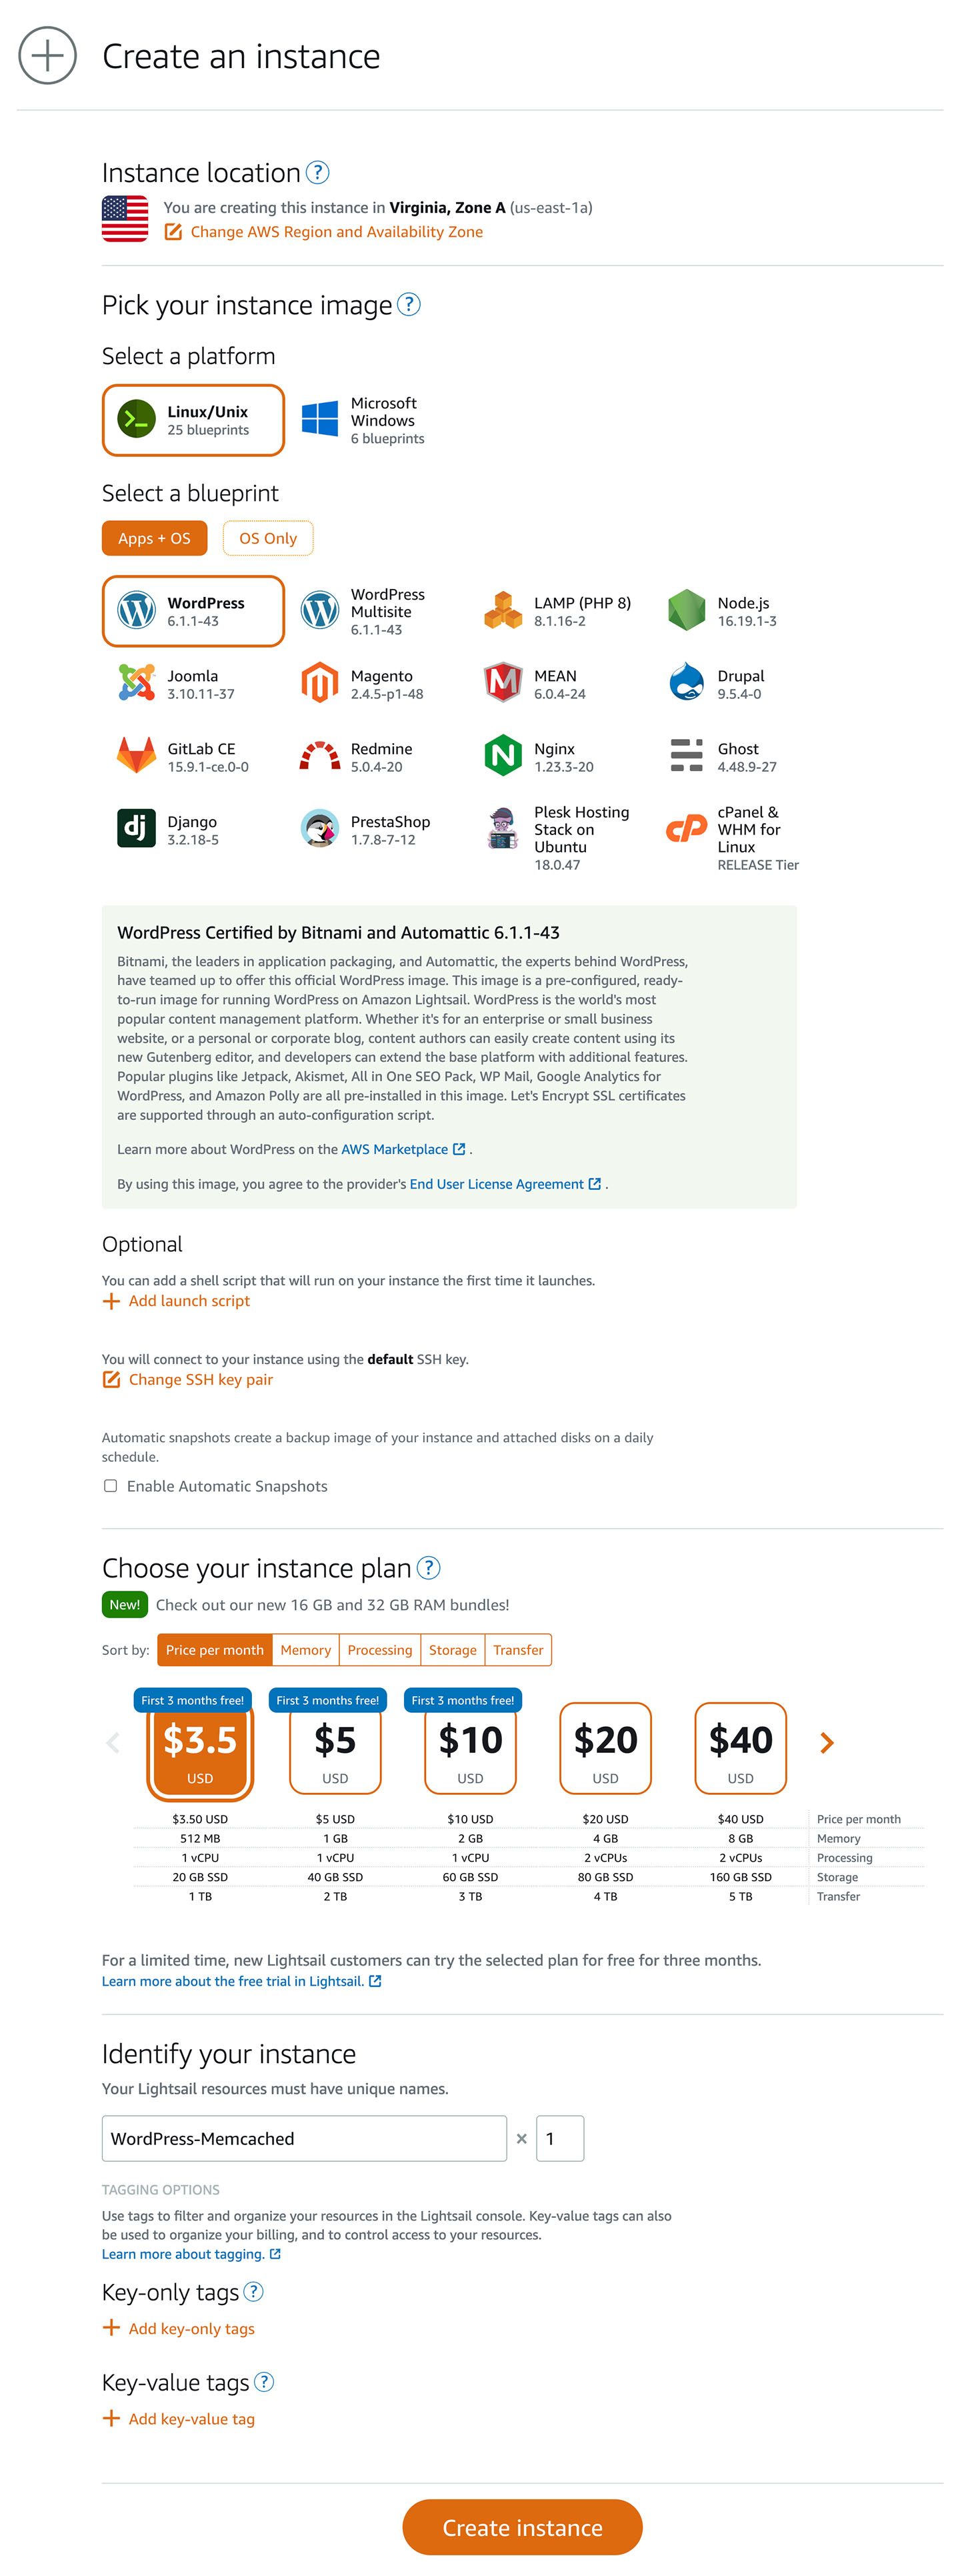
Finally, click Create instance.
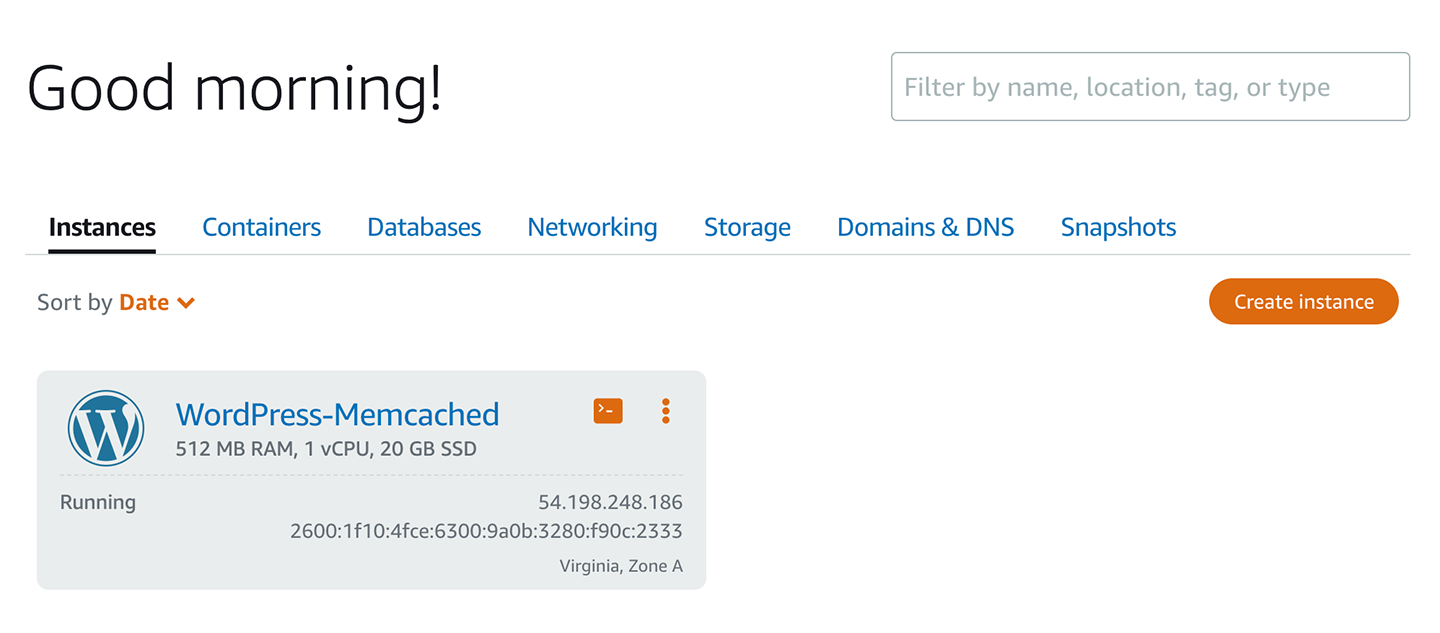
You’ll be redirected to the Lightsail dashboard, where your new instance will appear with the status Pending. The status should change to Running within a minute or two. Your Lightsail instance has been provisioned with WordPress installed.
To finish setting up WordPress on Lightsail, you’ll attach a static IP to your instance and get your WordPress Admin password.
Attach a static IP to your Lightsail instance
In this step, you’ll attach a static IP to your Lightsail instance so it can always be accessed at the same IP. Without a static IP, your instance IP would change on server reboots.
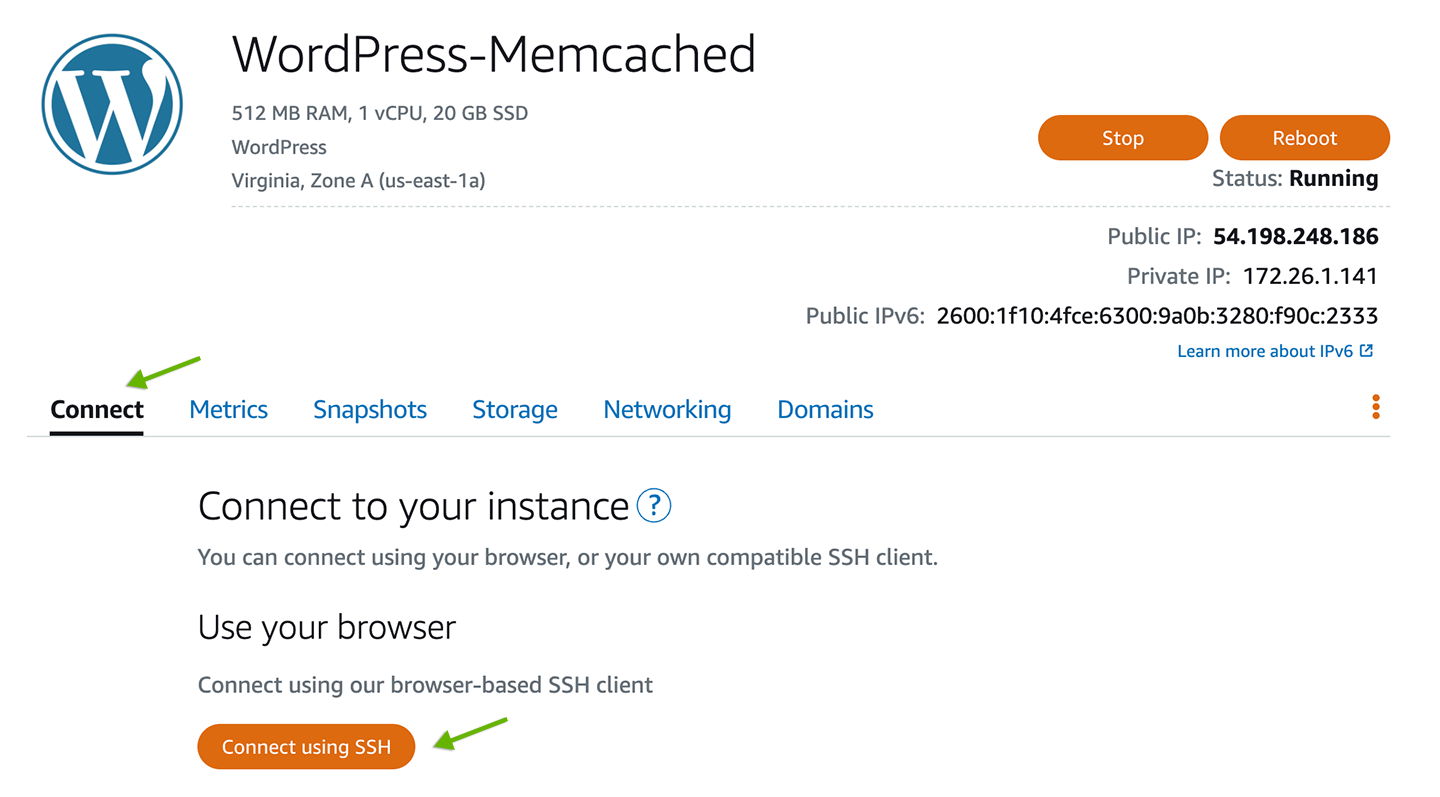
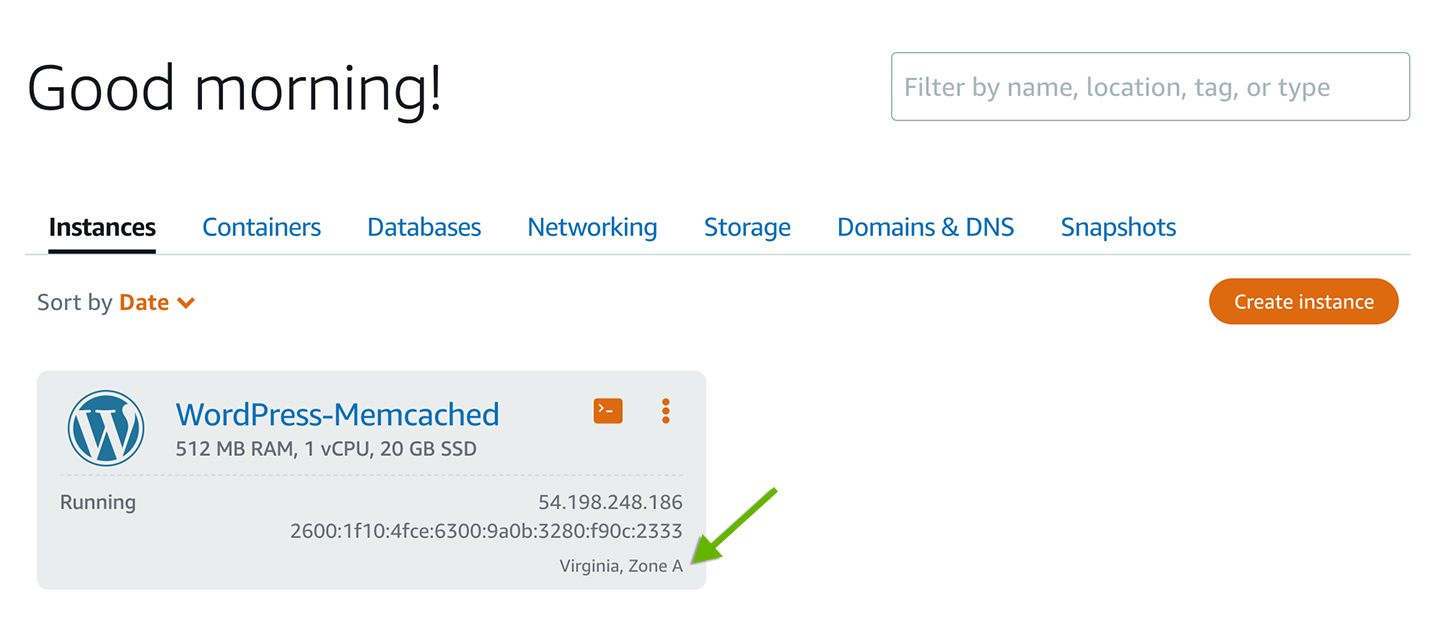
To attach a static IP, click on the name of your WordPress-Memcached instance, then click the Networking tab.
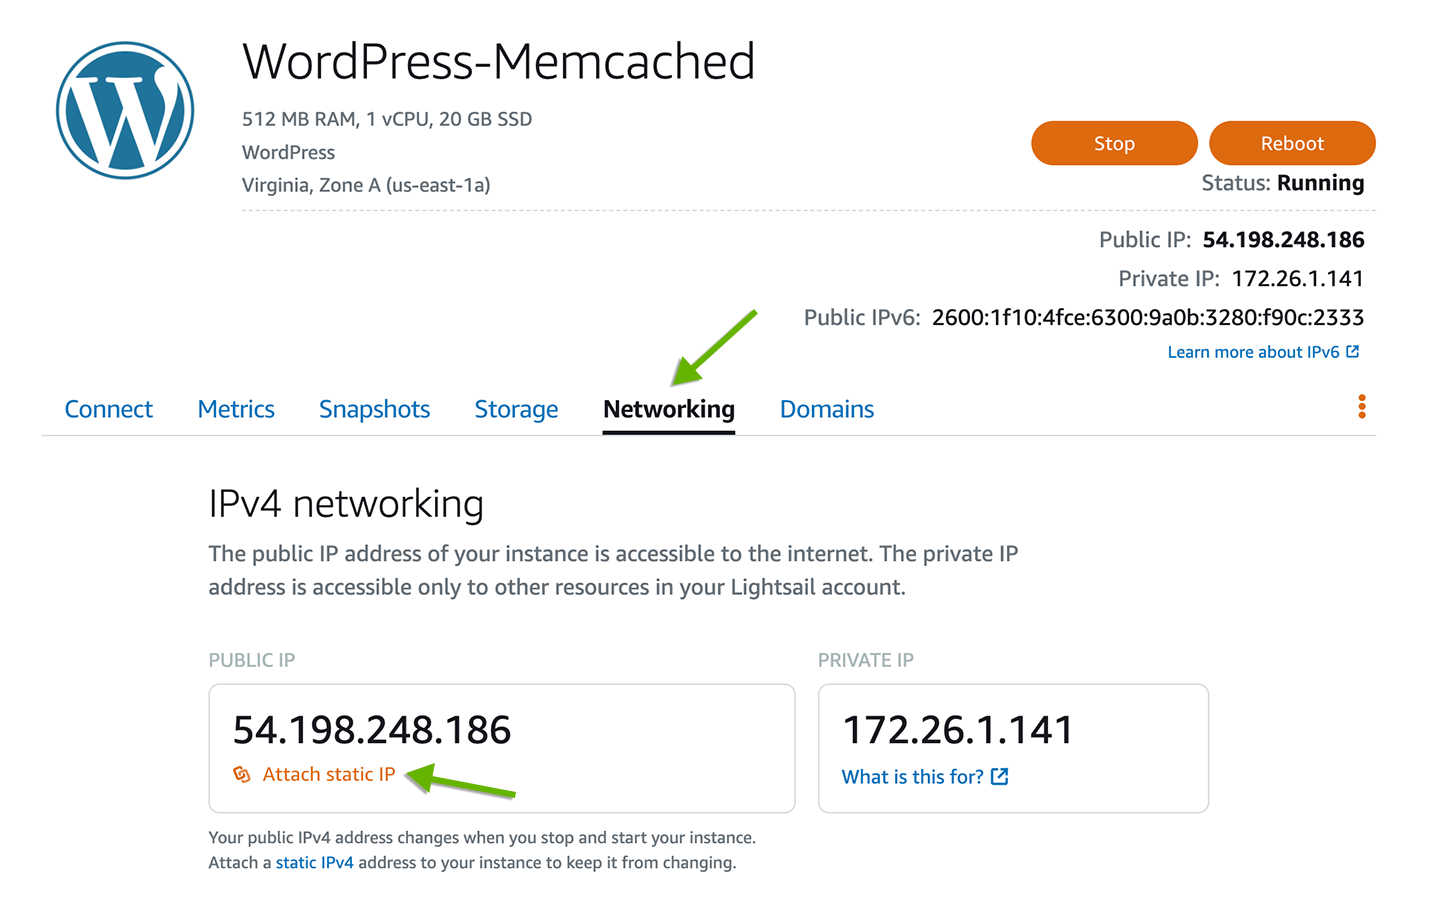
Under the PUBLIC IP card, you’ll see your current instance IP, and right underneath that, a link to Attach static IP. Click Attach static IP, and give the IP a name. I’ll use WordPress-Memcached-StaticIP. Then, click Create and attach.
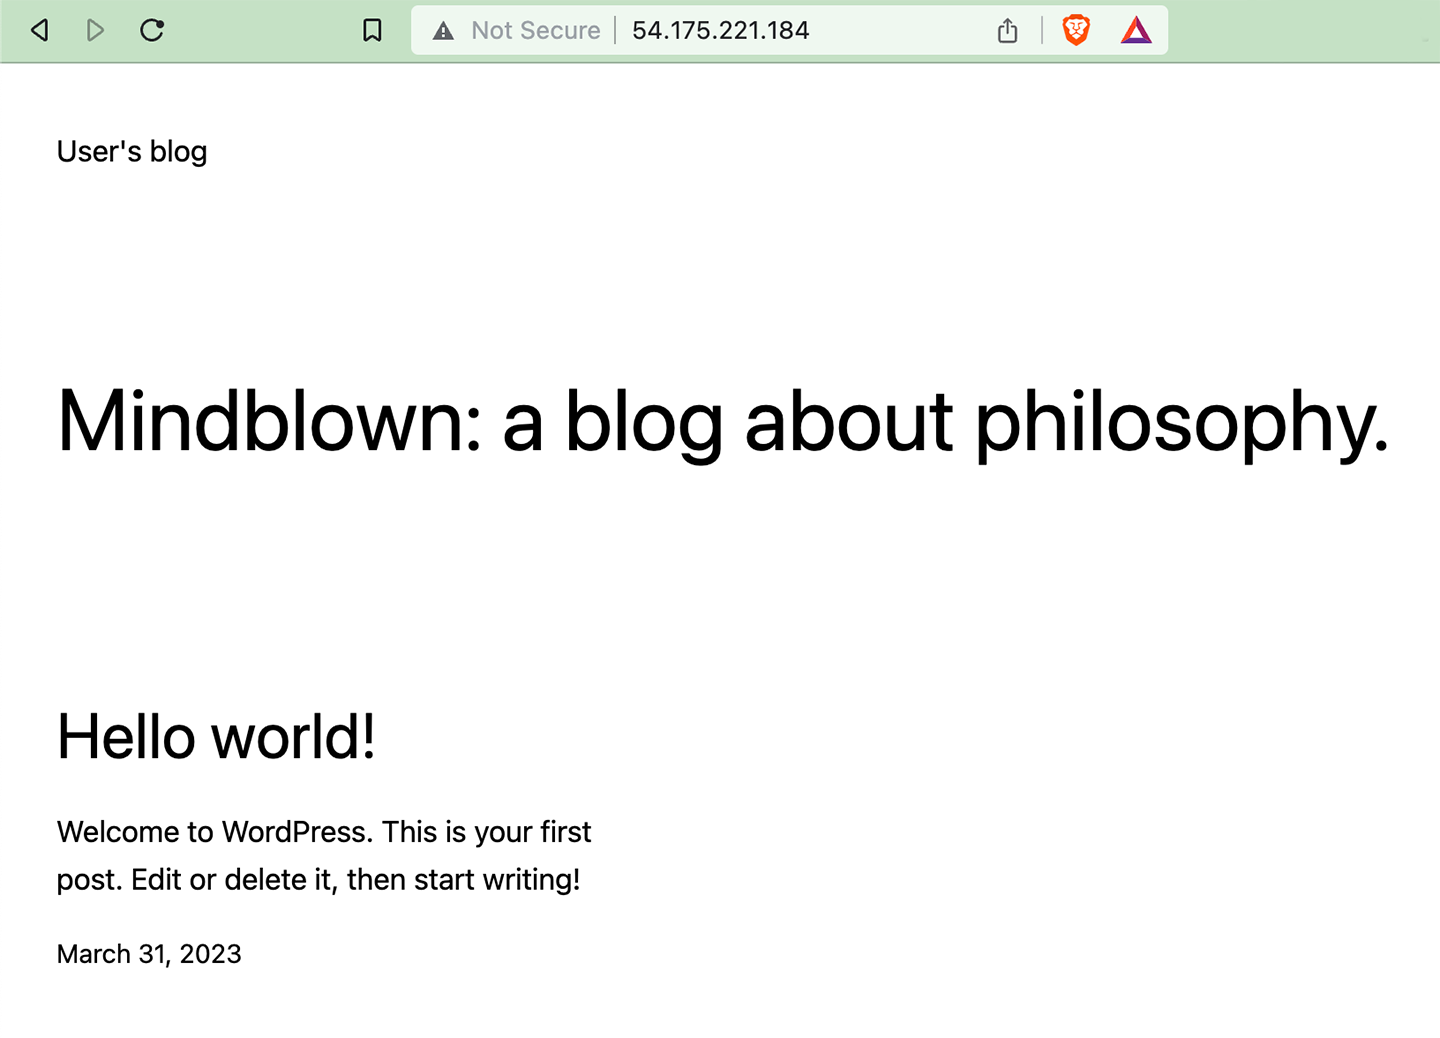
You’ll then see your new static IP, which will look something like 54.175.221.184. Copy and paste it into your browser address bar to visit your WordPress website.
Get your Lightsail WordPress password
An admin user, named user, is automatically created for you when Lightsail installs WordPress.
You must establish an SSH connection to retrieve your Bitnami WordPress Admin password. Fortunately, Lightsail provides an in-browser terminal allowing you to connect directly to your instance from your Lightsail instance dashboard. Alternatively, you can connect to your instance via SSH from a standard terminal.
Still on your Lightsail instance dashboard, click the Connect tab. Then, click Connect using SSH to open up a terminal in a new browser window.
To get your password, enter the following command in the terminal and press the Enter key.
cat $HOME/bitnami_application_passwordIt will output your WordPress admin user’s password.
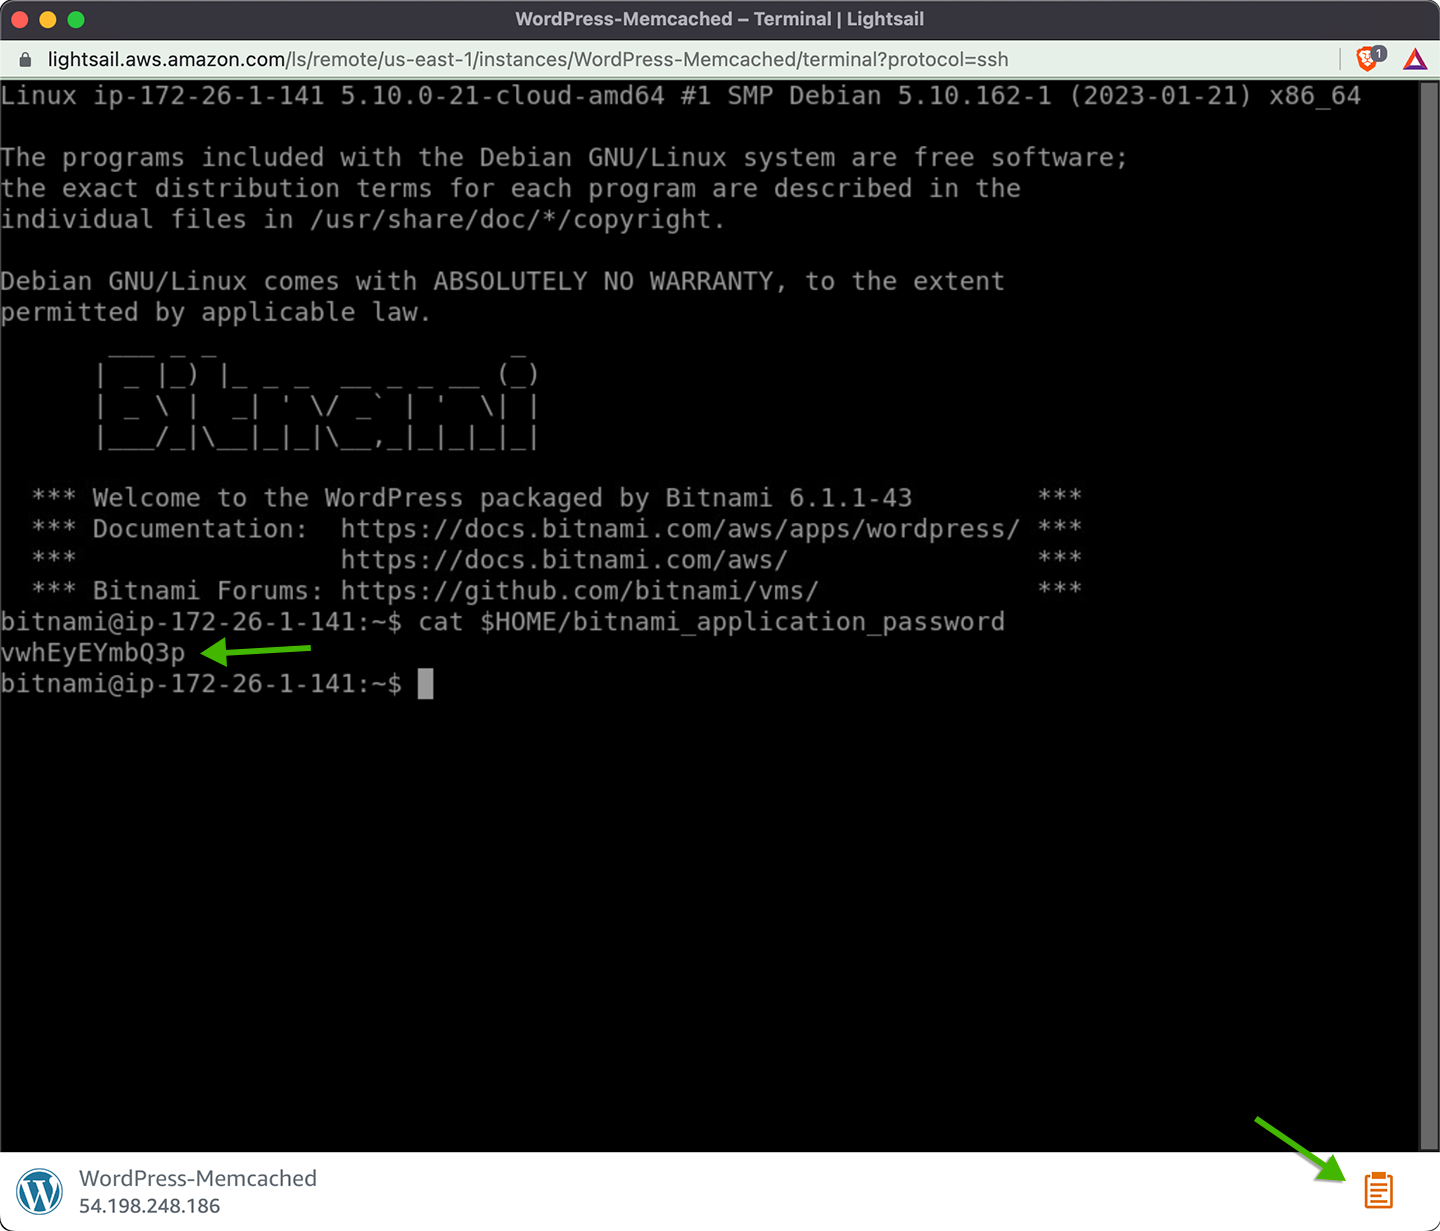
Because of limitations with the in-browser terminal window, you can’t highlight the password and copy it as usual. To copy the password, click the clipboard icon, which is found at the bottom-right of the terminal window. It will open up a remote clipboard with the password.
You can close the terminal once you’ve copied the password.
You now have everything you need to log in to the WordPress Admin.
Open the WordPress Admin in your browser at <your static IP>/wp-admin. For example, 54.175.221.184/wp-admin. Then, log in with your username, user, and the password you just copied from the terminal.
With that, your WordPress on Lightsail setup is complete.
Install the LiteSpeed Cache plugin
LiteSpeed Cache is a popular WordPress plugin designed to enhance the performance and speed of WordPress websites. The plugin offers many optimization features, including object caching, image optimization, CSS/JS minification, and lazy loading. By combining these features, website owners can achieve improved site speeds and user experience.
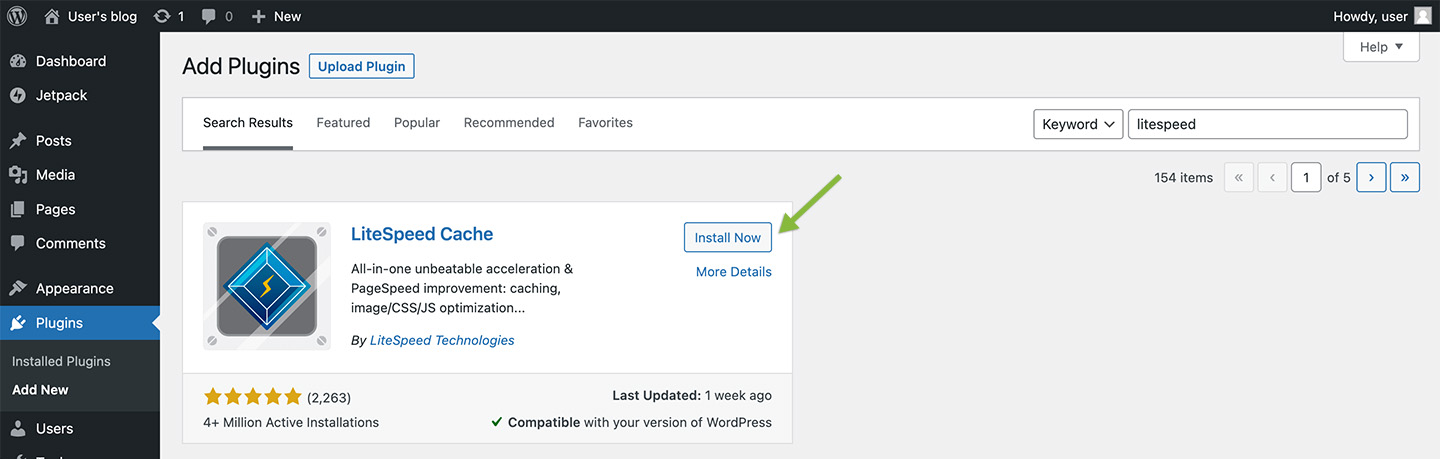
To install the LiteSpeed Cache plugin, from the WordPress Admin, click on Plugins, then Add New.
Search for LiteSpeed Cache, then click Install Now.
Next, click Activate to activate the plugin.
Fix the WP_CACHE error
After activating the plugin, you’ll likely see the following error message. The error occurs because the file wp-config.php is configured by the Bitnami WordPress image as not writable, and the LiteSpeed Cache plugin wants to write to it but cannot do so.
wp-config.php operation failed when changing
WP_CACHEconst: File /opt/bitnami/wordpress/wp-config.php is not writable.
There are a couple of solutions to this issue.
One solution is to change permissions for wp-config.php to make it writeable. Then, refresh the WordPress Admin so LiteSpeed Cache can try to write to the file again. And finally, to revert permissions for wp-config.php.
A simpler and less error-prone method is manually making the changes by editing wp-config.php. To do that, back on your Lightsail instance dashboard, from the Connect tab, click Connect using SSH again.
Edit wp-config.php by running the following command:
nano $HOME/stack/wordpress/wp-config.phpThat command will open wp-config.php in the nano text editor.
Use the down arrow key to move the cursor to the line // ** Database settings - You can get this info from your web host ** //. Just before that line, paste in the following lines:
// wp-config.php
// ...

/** Enable LiteSpeed Cache */
define( 'WP_CACHE', true );

// ** Database settings - You can get this info from your web host ** //

// ...
For the sake of brevity, code that has been removed from the entire file is denoted with an ellipsis (...).
Save the file by pressing the keys CTRL + X, then press Y to confirm you want to save changes, and finally press ENTER to save.
Close the terminal browser window.
Back on the WordPress Admin Plugins page, refresh the window. The error message should now be gone.
LiteSpeed Cache is now installed. Next, you’ll configure it to use Memcached.
Create a Memcached-compliant cache with MemCachier
To use Memcached with LiteSpeed Cache on AWS Lightsail, you must first provision a cache. You can get one quickly and easily for free from MemCachier.
MemCachier provides easy-to-use, performant caches compatible with the popular Memcached protocol and available in several AWS regions. It allows you to use a cache without setting up and maintaining actual Memcached servers.
Head over to MemCachier and create an account.
Once logged in to your account, click NEW CACHE to create a new cache.
Enter a Nickname. I’ll be using Lightsail WordPress Memcached.
Then, select Amazon Web Services (EC2) as the provider.
Choose the same region your Lightsail instance is in. If you chose the same as me earlier, that is US East (N. Virginia).
If you need to find your Lightsail region, go to the Lightsail instance dashboard. Below the instance title, you’ll find its region and availability zone, e.g., Virginia, Zone A (us-east-1a).
Next, choose a free development plan, $0.00/hour 25MB.
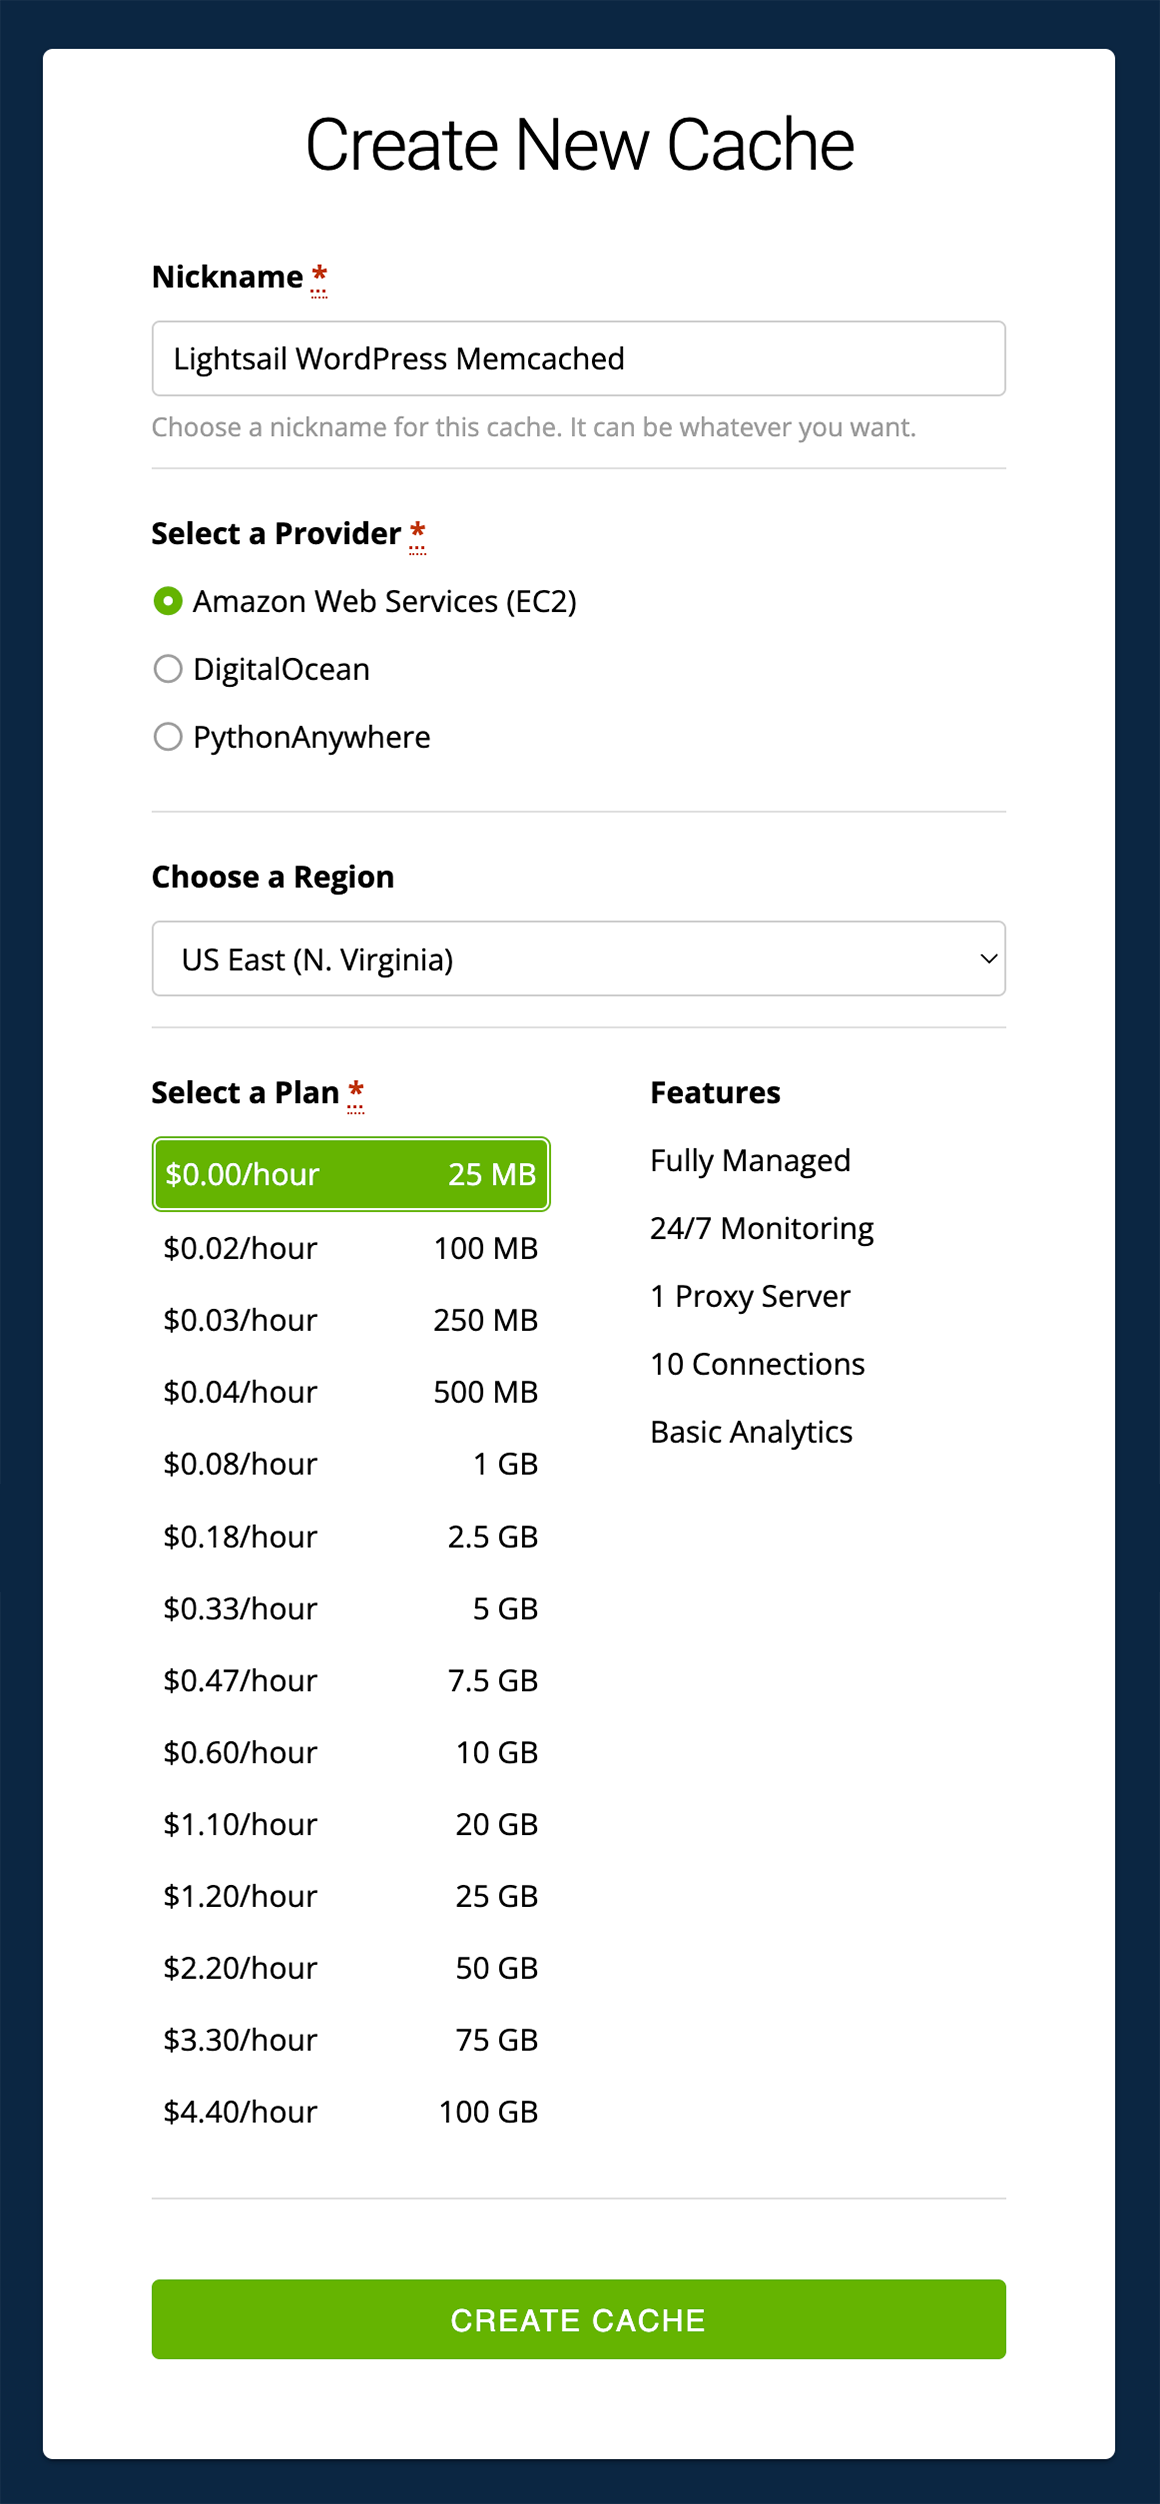
Finally, click CREATE CACHE.
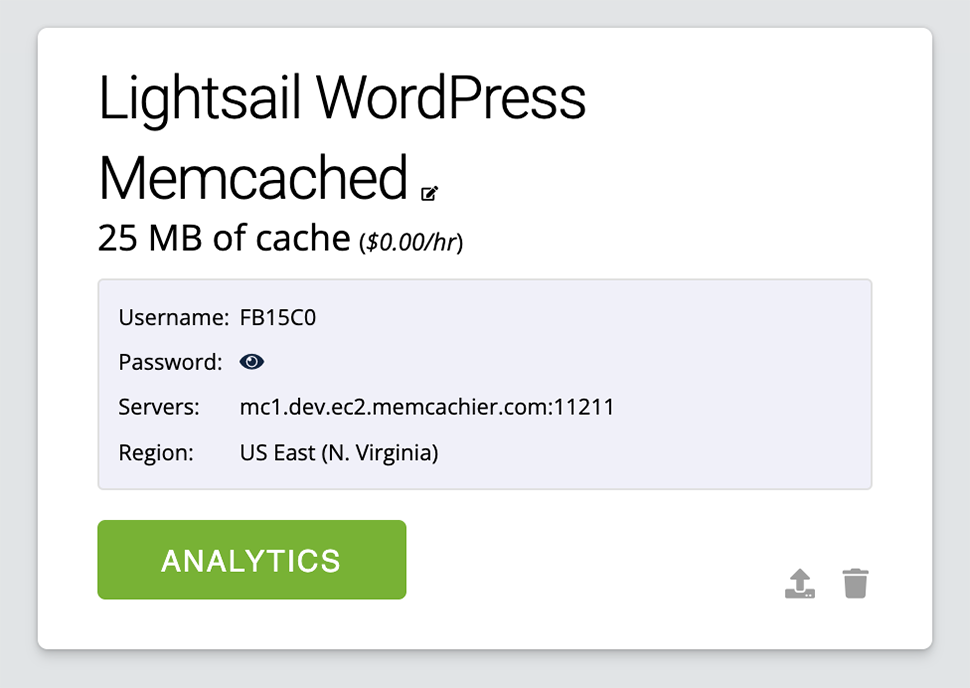
After creating your cache, note its Username, Password and Servers. You’ll use these when configuring LiteSpeed Cache shortly.
Add a Lightsail firewall rule to allow it to connect to your cache
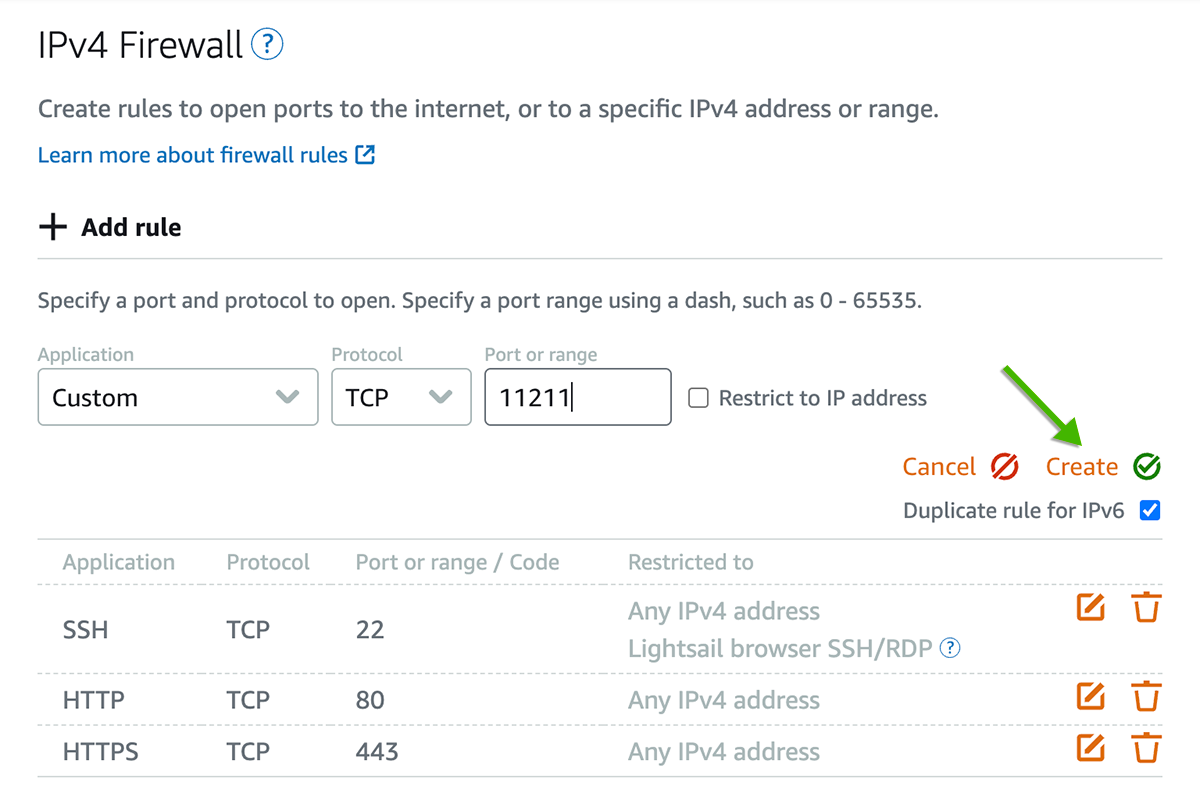
In this step, you’ll open up port 11211 in your Lightsail instance firewall so it can connect to your cache.
From your Lightsail instance dashboard, click on the Networking tab. Scroll to the IPv4 Firewall section and click Add rule.
Select Application: Custom, Protocol: TCP and Port or range: 11211, and click Create.
You now have a Memcached cache that Lightsail is configured to use. You’re ready to configure LiteSpeed Cache to use Memcached for object caching.
Configure LiteSpeed Cache to use MemCachier
Go back to your WordPress Admin, to the LiteSpeed Cache Settings page. If you need to find the settings page again, click LightSpeed Cache, then Cache, from the left-hand sidebar menu.
First, click ON to enable the Object Cache.
Then, update the host, port, username, and password fields.
For host, use the first part of your MEMCACHIER_SERVERS value, the part before the colon. For example, if your MEMCACHIER_SERVERS value is mc1.dev.ec2.memcachier.com:11211, you would set the host value to mc1.dev.ec2.memcachier.com.
For port, use the part of your MEMCACHIER_SERVERS value after the colon, 11211.
Use your MEMCACHIER_USERNAME and MEMCACHIER_PASSWORD values for username and password.
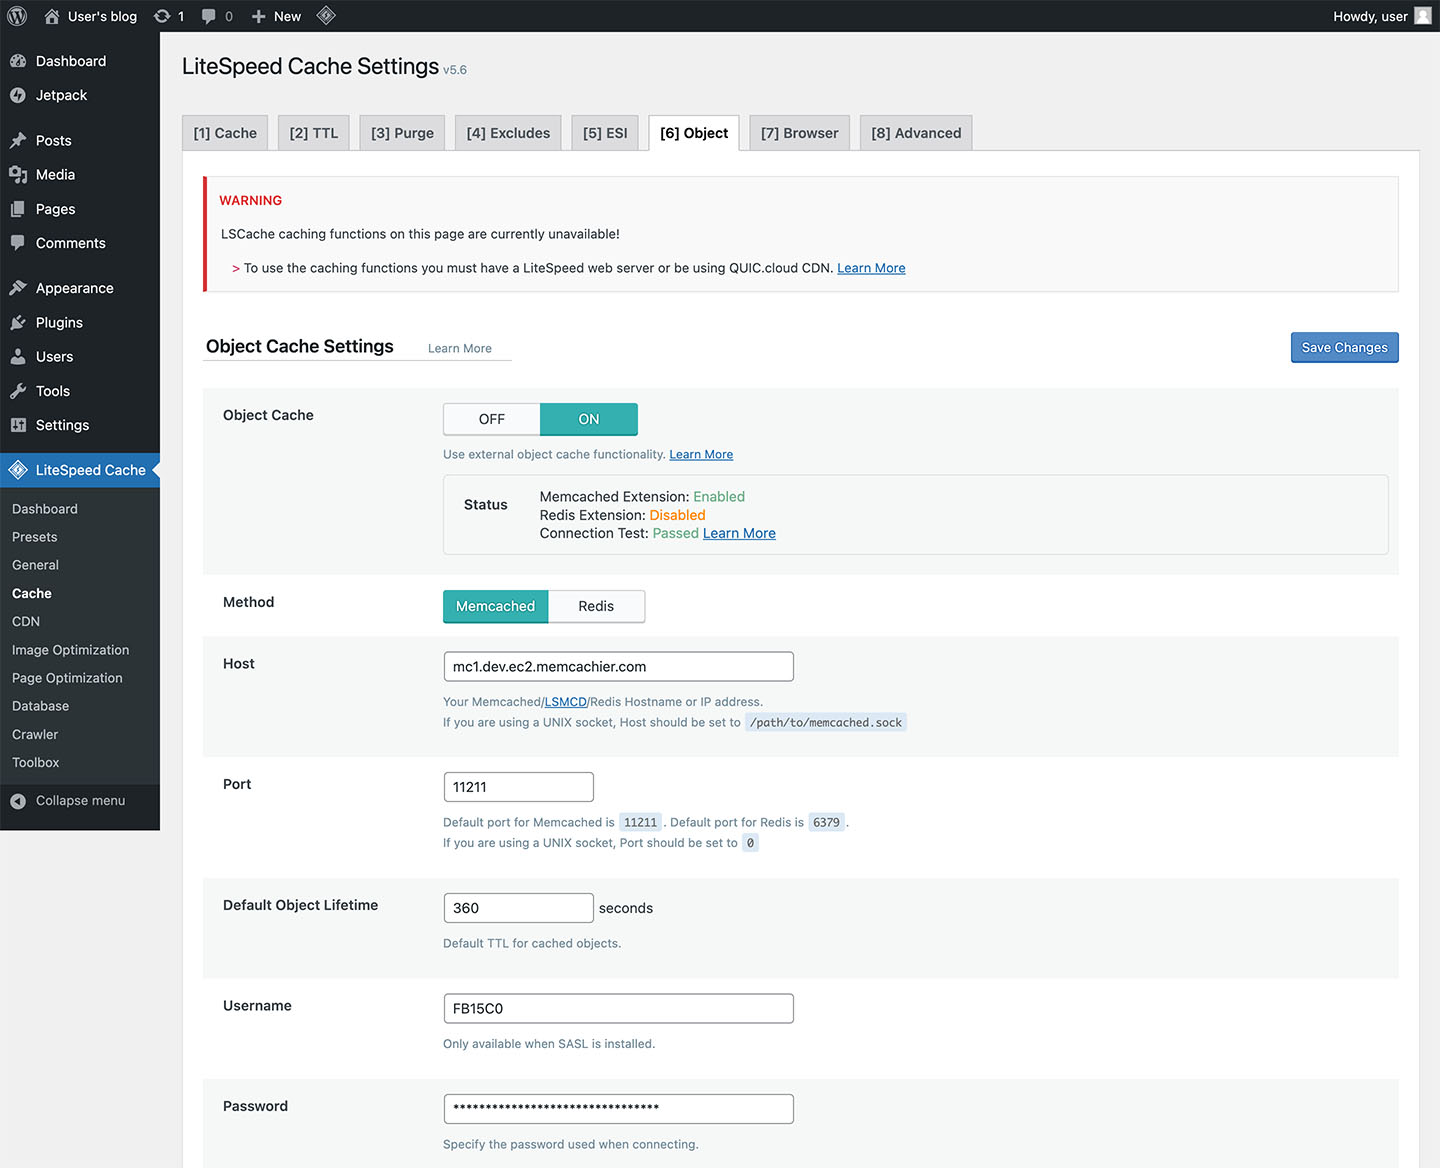
You’ll likely see the notice WARNING LSCache caching functions on this page are currently unavailable! To use the caching functions, you must have a LiteSpeed web server or be using QUIC.cloud CDN. You can ignore that message as the LiteSpeed Object Cache feature you’ll configure will still work. Learn more about LiteSpeed Web Server and its LSCache Module.
Click Save Changes. LiteSpeed Cache is now using MemCachier as its Object Cache.
Verify Memcached is working
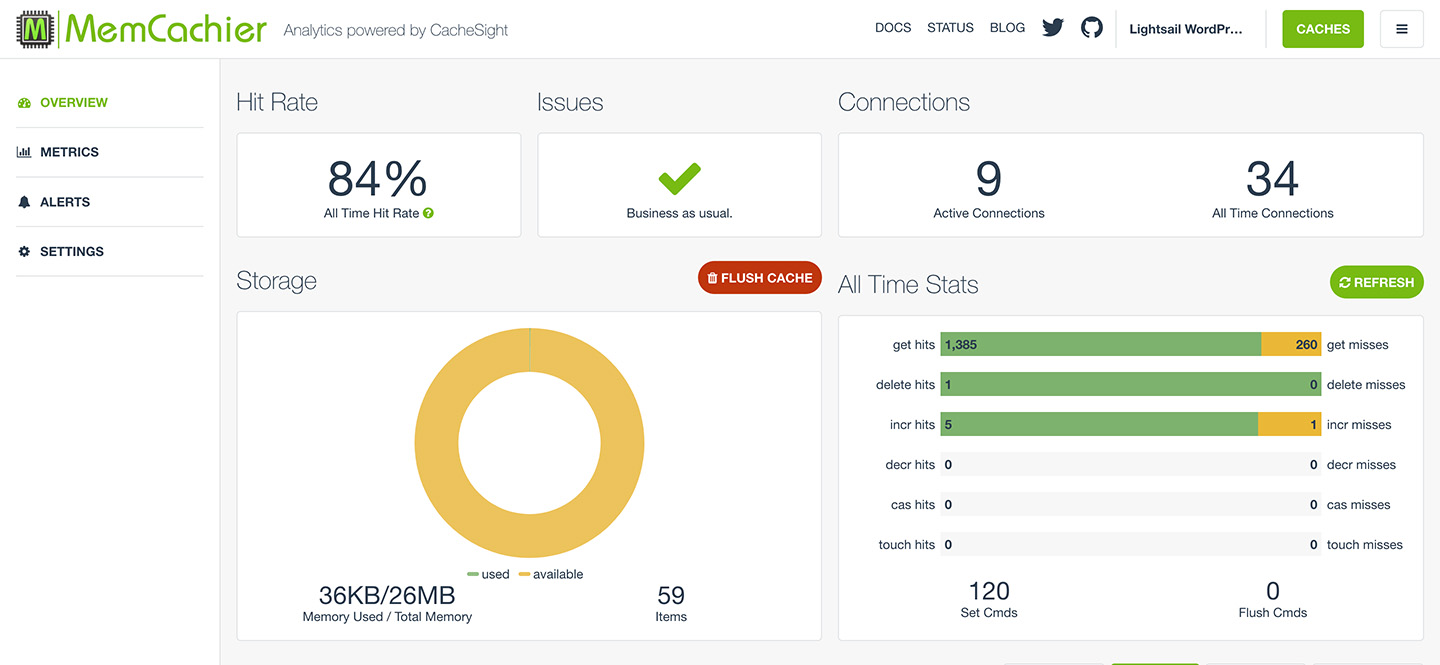
To verify your cache is working, check your MemCachier analytics dashboard. To open the analytics dashboard, while logged into your MemCachier account, view the Caches page, then click the ANALYTICS button for your cache.
Notice the stats change when you refresh your WordPress website. On the All Time Stats card, you’ll see misses increase initially as items are missed, then stored in your cache. Then, you’ll see hits increase as those items are served from the cache.
The MemCachier analytics dashboard displays your cache’s statistics so you can monitor performance and troubleshoot issues quickly and easily.
Conclusion
You now have a WordPress website installed on AWS Lightsail with optimized performance thanks to the LiteSpeed Cache plugin and MemCachier.
Lightsail is the easiest way to install WordPress on AWS. It does some of the hard work in using Memcached as a caching method with the LiteSpeed Cache plugin by coming with the Memcached PHP extension already installed and enabled. MemCachier offers the quickest and easiest way to set up a Memcached cache for AWS Lightsail while providing speedy performance and high availability. With AWS Lightsail, LiteSpeed Cache, and MemCachier, you have a powerful combination to take your WordPress performance to the next level.