Configure W3 Total Cache with Memcached and SASL Authentication on DigitalOcean
 Paddy
~ April 6, 2023
Paddy
~ April 6, 2023
In this tutorial, you’ll install WordPress as a 1-Click Droplet on DigitalOcean. You’ll then install the W3 Total Cache WordPress plugin and configure it to use Memcached with SASL authentication, using a Memcached-compliant cache provisioned by MemCachier. By the end of the tutorial, you will have a fully functional WordPress site running on DigitalOcean with enhanced performance thanks to the W3 Total Cache plugin and Memcached.
Outline
- Prerequisites
- Install WordPress as a 1-Click Droplet on DigitalOcean
- Log in to WordPress Admin
- Install the W3 Total Cache plugin
- Provision a Memcached-compliant cache with MemCachier
- Install the Memcached PHP extension
- Configure W3 Total Cache to use Memcached
- Configure the W3 Total Cache Object Cache
- Check Memcached is working
- Conclusion
Prerequisites
Before you complete the steps in this tutorial, make sure you have the following:
- Familiarity with WordPress.
- A DigitalOcean account.
Install WordPress as a 1-Click Droplet on DigitalOcean
A WordPress Droplet is the easiest and most popular way to install WordPress on DigitalOcean. You’ll have a WordPress website up and running in a few clicks.
Log in to your DigitalOcean account and go to the WordPress Droplet page on the DigitalOcean Marketplace.
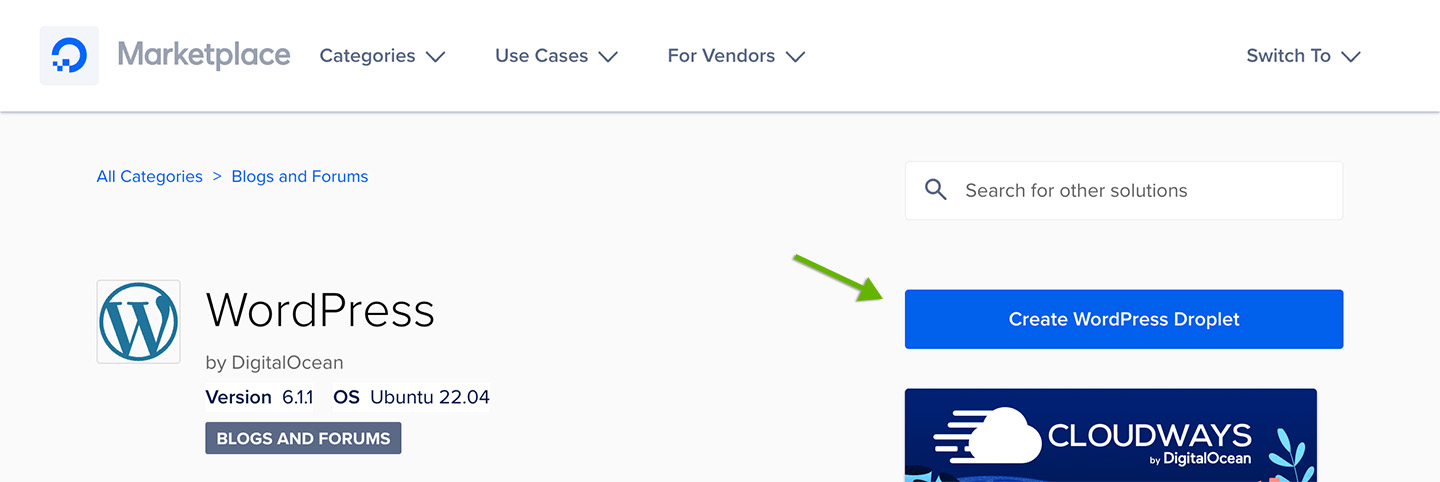
Next, click Create WordPress Droplet.
On the Create Droplets page, choose the following options:
- Choose Region: I’ll use New York for this tutorial.
- Datacenter: I’ll use NYC1. You would choose the data center closest to you or your users for a production site. Note your data center, as you’ll need it later.
- VPC Network: Leave as the default.
- Choose an image: The WordPress image will already be selected for you.
- Choose Type: Leave as the default Basic.
- CPU options: Select Regular and choose the smallest available plan, $6/mo at the time of writing. The most inexpensive plan is more than sufficient for this tutorial.
- Choose Authentication Method: For simplicity I’ll choose Password and create a root password. If you’re familiar with working with SSH keys, feel free to choose SSH Key. SSH Key is the recommended authentication method. Learn how to configure SSH key-based authentication.
- Finalize Details: Give your Droplet an identifying name. I’ll use wordpress-memcached. Select a project for your Droplet. I’ll use a project I created named Tutorial. You can choose any of your projects.
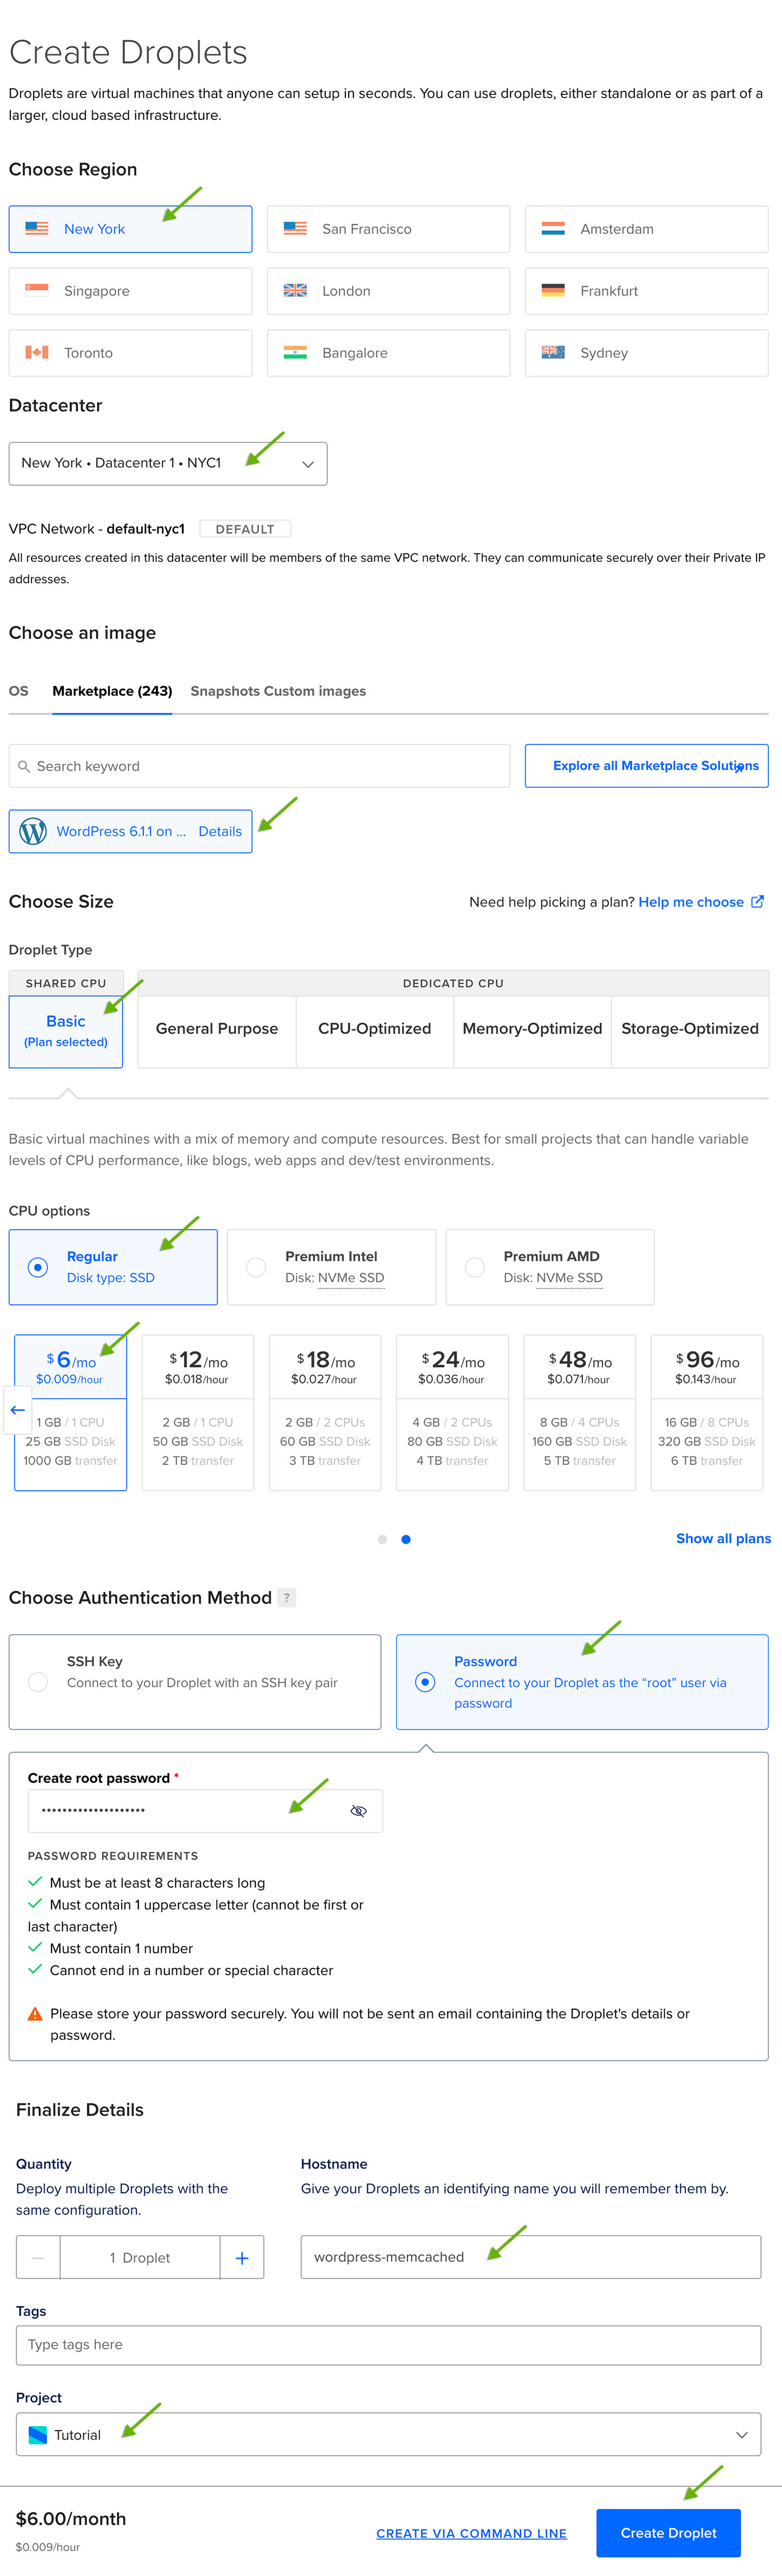
Finally, click Create Droplet.
You’ll be redirected to your project dashboard, where your new WordPress Droplet will appear.
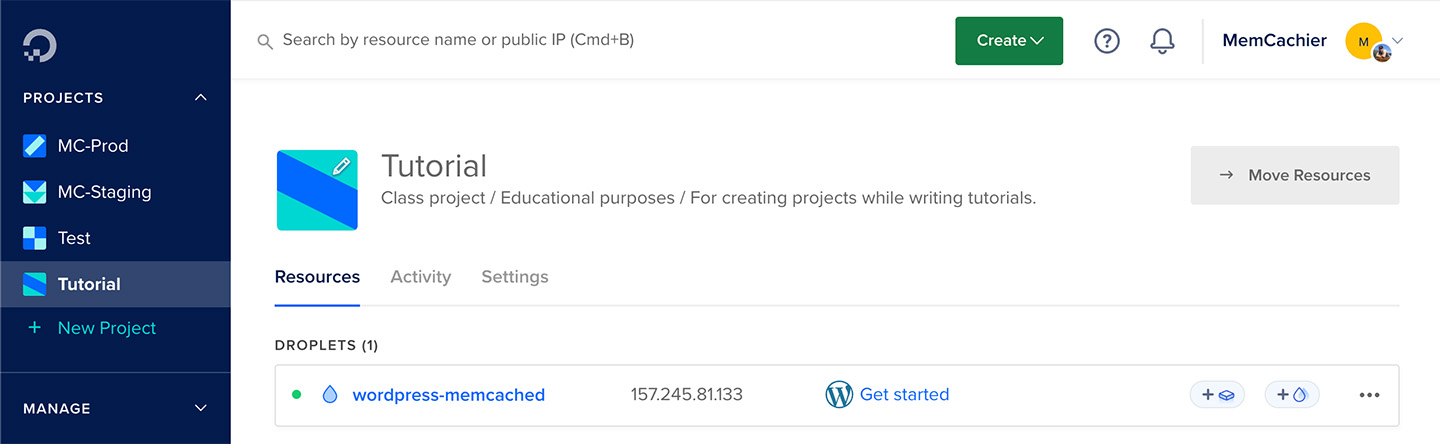
Your Droplet IP address will appear once it has been created. Next, you’ll use that IP to connect to your Droplet and finish setting up WordPress.
Connect via SSH and complete the WordPress setup
In this step, you’ll connect to your Droplet via SSH and run the WordPress setup script to complete its installation.
Copy your Droplet IP. Then, open a terminal window and run the following command to connect to your Droplet:
$ ssh root@<YOUR_DROPLET_IP>For example, ssh root@54.175.221.184.
You’ll be prompted, Are you sure you want to continue connecting? Type yes, and press the ENTER key to confirm.
You’ll then be prompted for your Droplet password. Enter the password and press the ENTER key.
After entering your password, you should be connected to your Droplet, and the WordPress setup script will automatically run, prompting you for several pieces of information.
- Domain/Subdomain name: Enter a domain name if you have one you would like to use. Otherwise, for this tutorial, use the Droplet IP. Enter a value and press
ENTER. - Your Email Address: Enter an email address for the WordPress Admin user
- Username: Enter a username for the WordPress Admin user.
- Password: Enter a password for the WordPress Admin user. Note characters are hidden as you type your password.
- Blog Title: Enter a title for your WordPress website.
- Is the information correct? Type
Yand pressENTER. - Would you like to use LetsEncrypt (certbot) to configure SSL(https) for your new site? Without a fully qualified domain name (FQDN), Let’s Encrypt cannot be set up, so skip this step. Type
nand pressENTERto confirm.
The WordPress setup will now complete. You’ll see some output in the terminal, Completing the configuration of WordPress.... When it’s done, you’ll see the following:
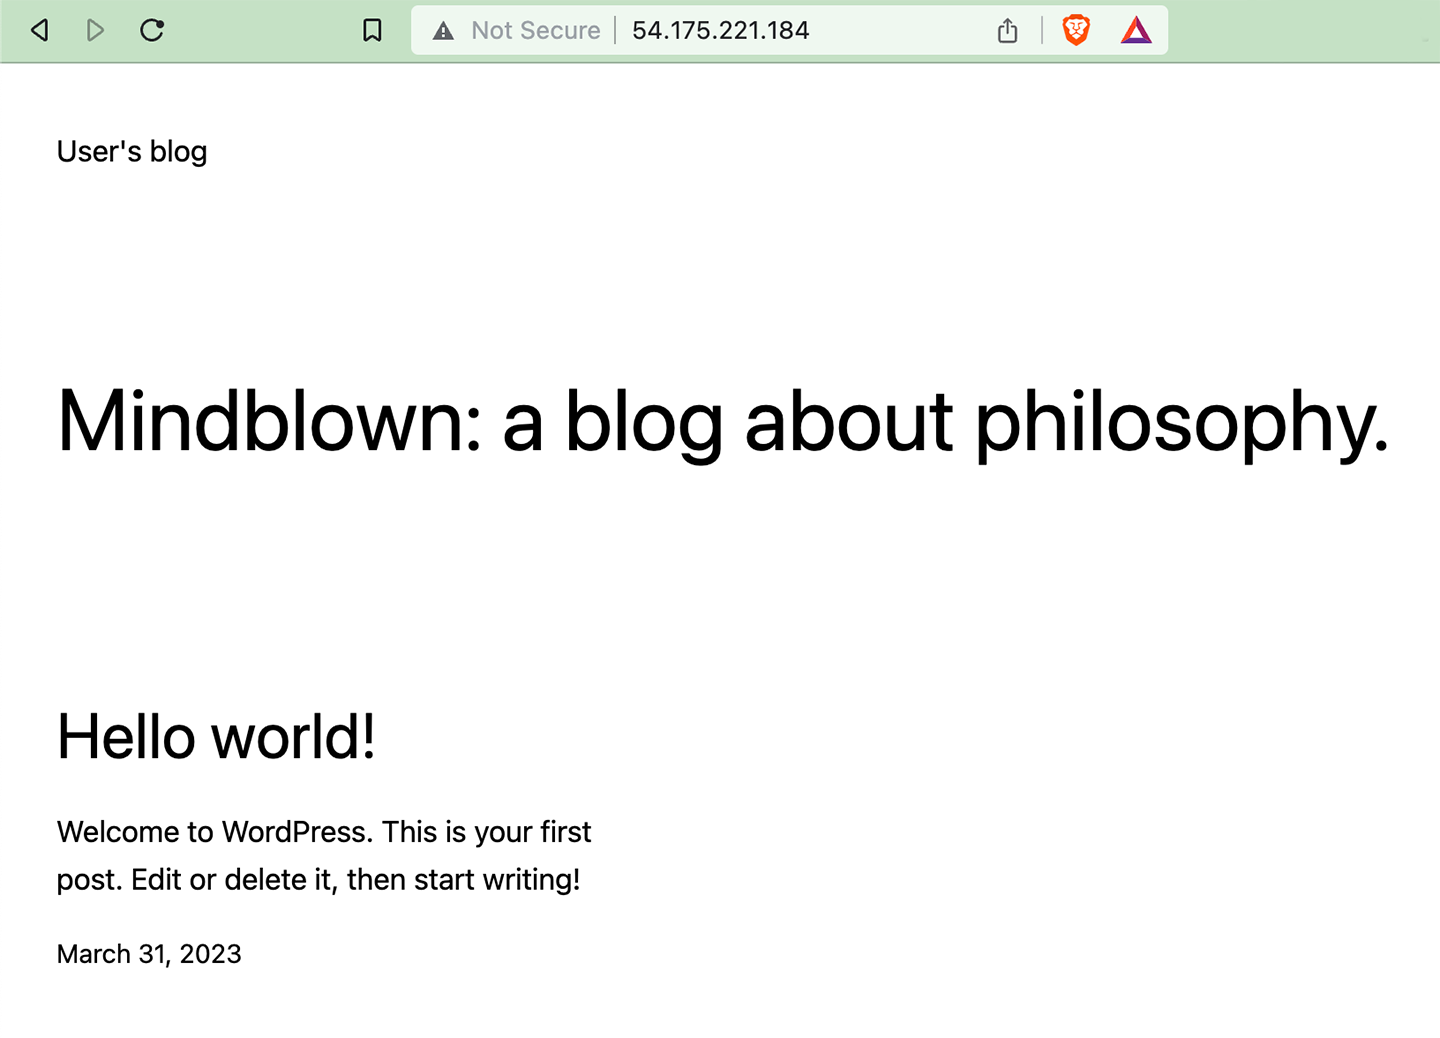
Installation complete. Access your new WordPress site in a browser to continue.You can now access your WordPress site by opening your Droplet IP in a browser.
Log in to WordPress Admin
Open the WordPress Admin in your browser at <YOUR_DROPLET_IP>/wp-admin. For example, 54.175.221.184/wp-admin. Then, log in with the username and password you chose.
With that, your WordPress on DigitalOcean setup is complete. You can leave the terminal window open. You’ll use it again later to modify your Droplet. Next, you’ll install the W3 Total Cache plugin.
Install the W3 Total Cache plugin
W3 Total Cache is a widely used WordPress plugin that provides website owners with various features to optimize site performance. The plugin improves website speed, user experience, and search engine rankings by caching pages and posts, minifying CSS and JavaScript, and integrating with content delivery networks (CDNs). By installing the W3 Total Cache plugin, website owners can significantly reduce page load times, enhance the site’s responsiveness, and ultimately provide a better browsing experience to their visitors.
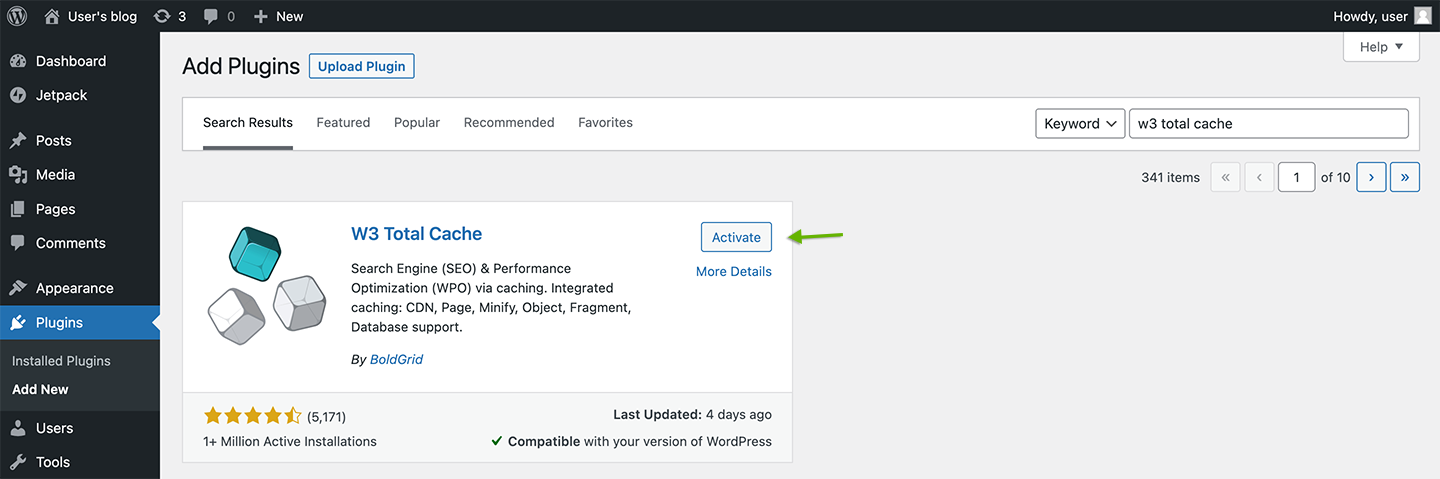
To install the W3 Total Cache plugin, from the WordPress Admin, click on Plugins, then Add New.
Search for W3 Total Cache. Click Install Now on the W3 Total Cache card. Once installed, click Activate to activate the plugin.
Provision a Memcached-compliant cache with MemCachier
You need a cache to use Memcached with W3 Total Cache on DigitalOcean. You’ll provision one with the MemCachier Add-On from the DigitalOcean Marketplace.
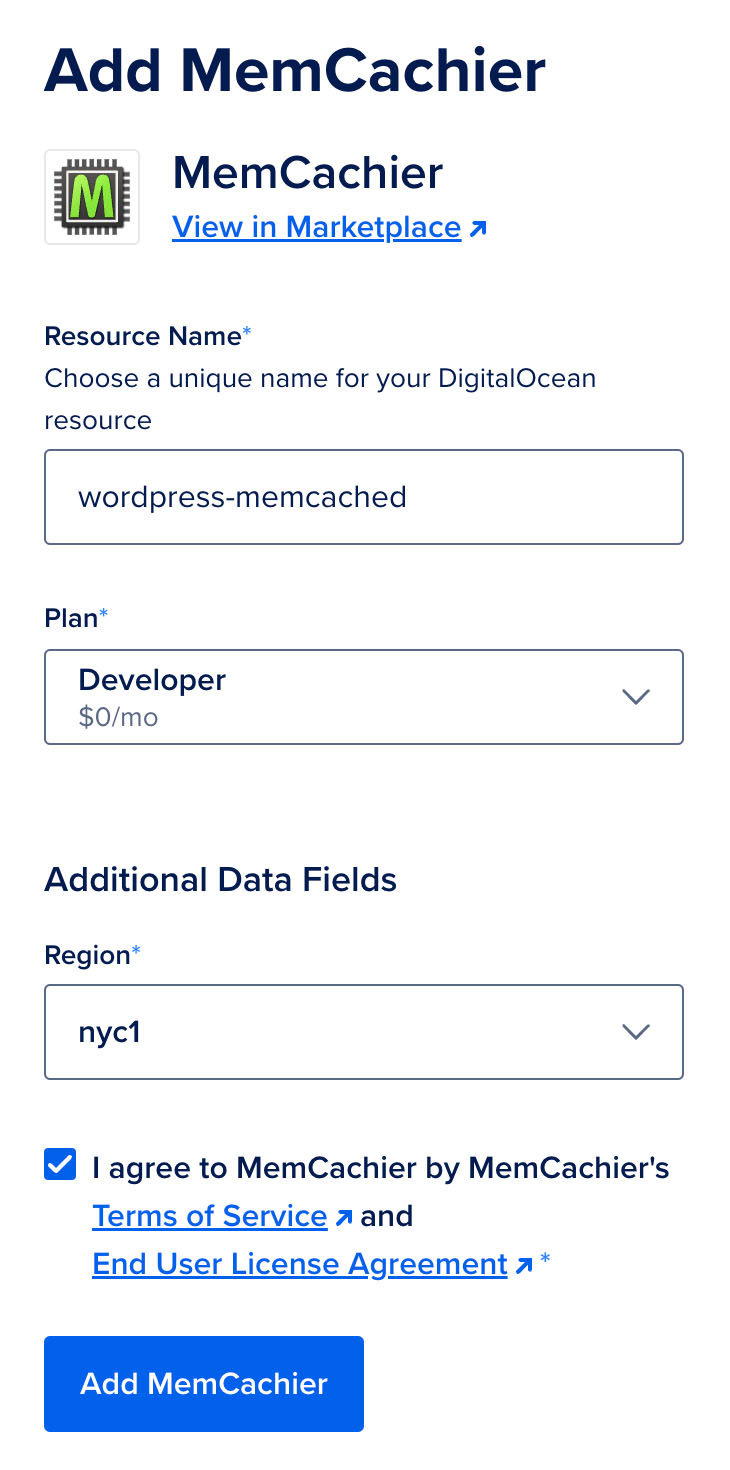
First, you’ll add the MemCachier Add-On from the DigitalOcean Marketplace. Visit the MemCachier Add-On page and click Add MemCachier.
On the following screen, give the cache a name. I’ll re-use the Droplet name, wordpress-memcached. Leave the Plan as Developer $0/mo. Then, select the same Region you created your Droplet in. I’m using nyc1.
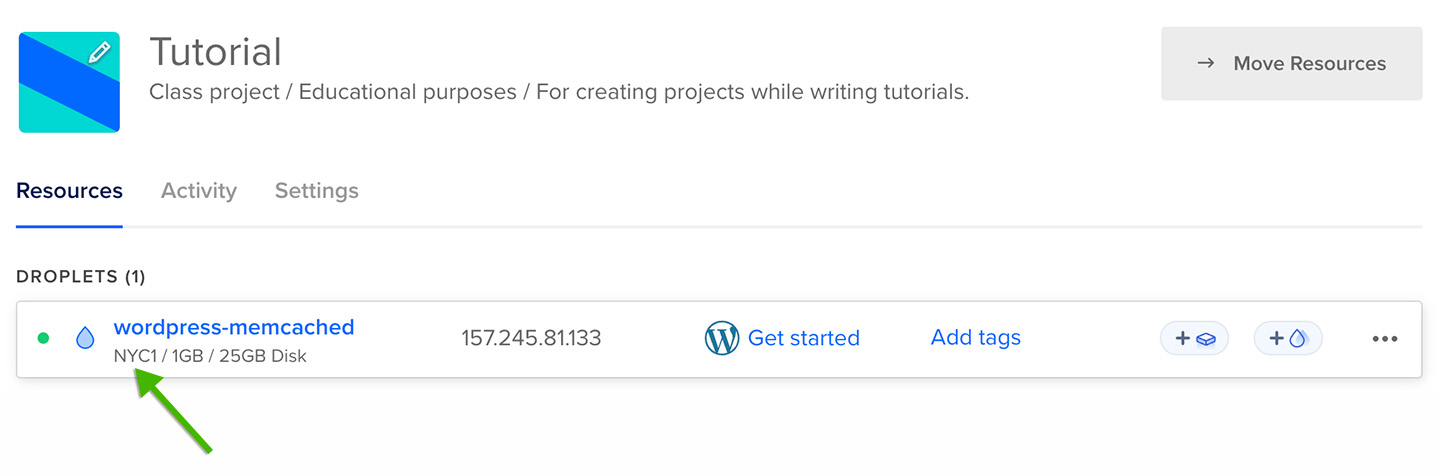
If you need to find your Droplet data center, go to your Project dashboard and hover over your WordPress Droplet. Below the Droplet title, its region will appear, e.g., NYC1.
Finally, click Add MemCachier to provision your cache.
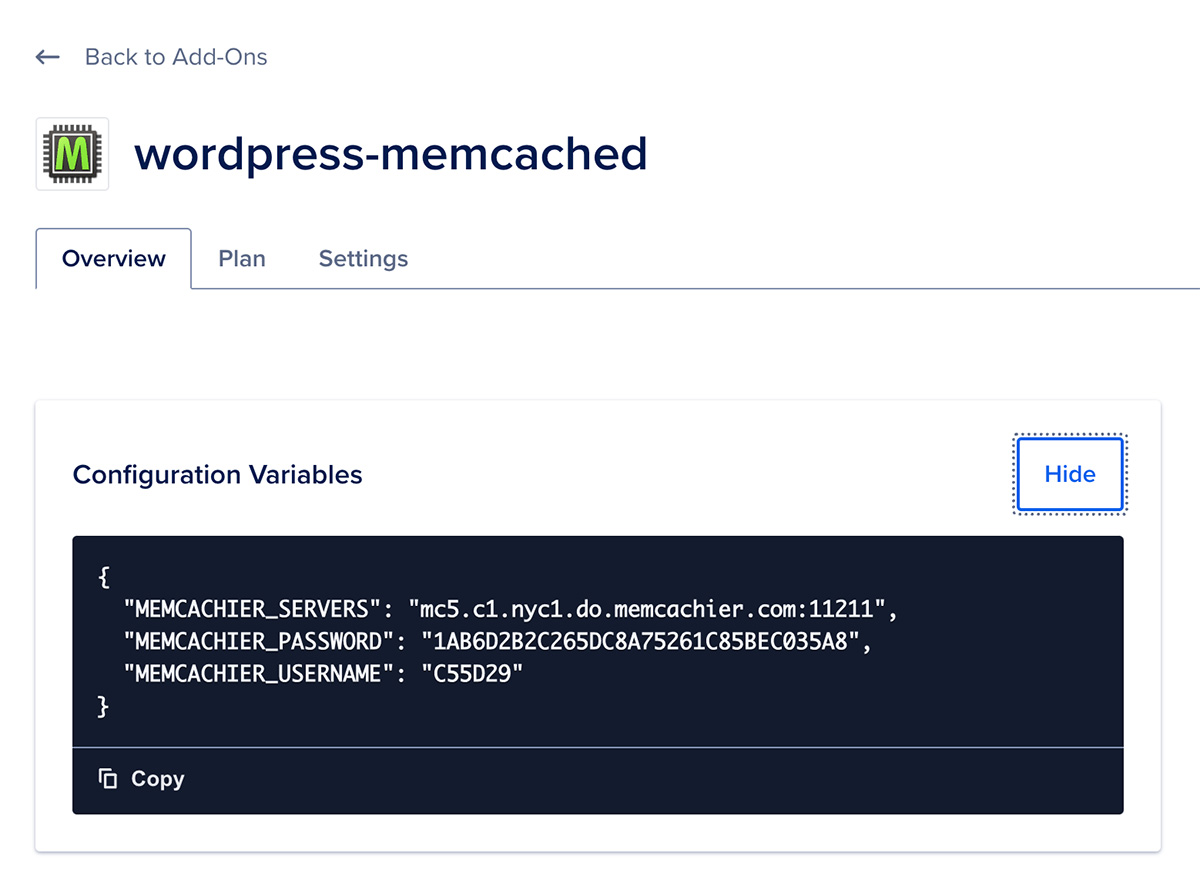
You’ll be redirected to your Add-Ons dashboard, where you’ll see your MemCachier cache. Click the cache title, wordpress-memcached, then beside Configuration Variables, click Show to view the values. Copy the cache configuration values. You’ll need them shortly to configure W3 Total Cache.
Next, you’ll install the Memcached PHP extension so W3 Total Cache can use Memcached as a caching method.
Install the Memcached PHP extension
The Memcached PHP extension is required to use Memcached as a caching method with W3 Total Cache. The Memcached extension is used, instead of the Memcache extension, because it supports SASL authentication. In simple terms, SASL authentication allows connecting to a cache with a username and password. Connecting to your MemCachier cache requires a username and password, so SASL authentication is necessary.
To install the Memcached PHP extension, switch back to your terminal window and reconnect to your Droplet if necessary.
Check if the extension is installed:
[root]$ php -mThat command will output a list of modules in alphabetical order. Notice memcached is not listed.
The WordPress Droplet runs on Ubuntu, so you’ll use its package manager to install the extension. Update your local package index to begin:
[root]$ sudo apt-get updateIt’s a good practice to run sudo apt-get update before installing any new packages or upgrading existing ones to ensure that your system has the most up-to-date information about the available packages.
Next, check the version of PHP. At the time of writing, the image uses PHP 8.0.28.
[root]$ php --versionIf the PHP version you see is different, find a compatible extension version and use the appropriate version when installing php-memcached:
[root]$ sudo apt-get install -y php8.0-memcachedTo take effect, restart Apache:
[root]$ systemctl reload apache2Make sure the memcached module is listed when you run the following:
[root]$ php -mAfter running that command, you’ll see memcached in the output.
Configure W3 Total Cache to use Memcached
To view the W3 Total Cache settings, click Performance on the WordPress Admin left sidebar menu. When you do this for the first time, you’ll be redirected to the W3 Total Cache Setup Guide. For now, click Skip at the bottom of that page. You can rerun it anytime by clicking Setup Guide from the Performance sub-menu.
Next, update the appropriate W3 Total Cache settings from WordPress Admin to use your MemCachier cache as its Memcached caching method.
Memcached can be used as a caching method for the following W3 Total Cache features:
- Object Cache
- Page Cache
- Minify
- Database Cache
Configuring each one involves the same two steps:
- Enable the feature, selecting Memcached as the caching method in General Settings.
- Configure the feature to use your MemCachier cache.
In the next section, you’ll configure the W3 Total Cache Object Cache. As mentioned, other Memcached-supported features require a very similar configuration process, so the following instructions should enable you to configure any of the other features.
Configure the W3 Total Cache Object Cache
To enable the Object Cache, from the WordPress Admin left-hand menu, click Performance, then General Settings. Then, scroll down to the Object Cache settings.
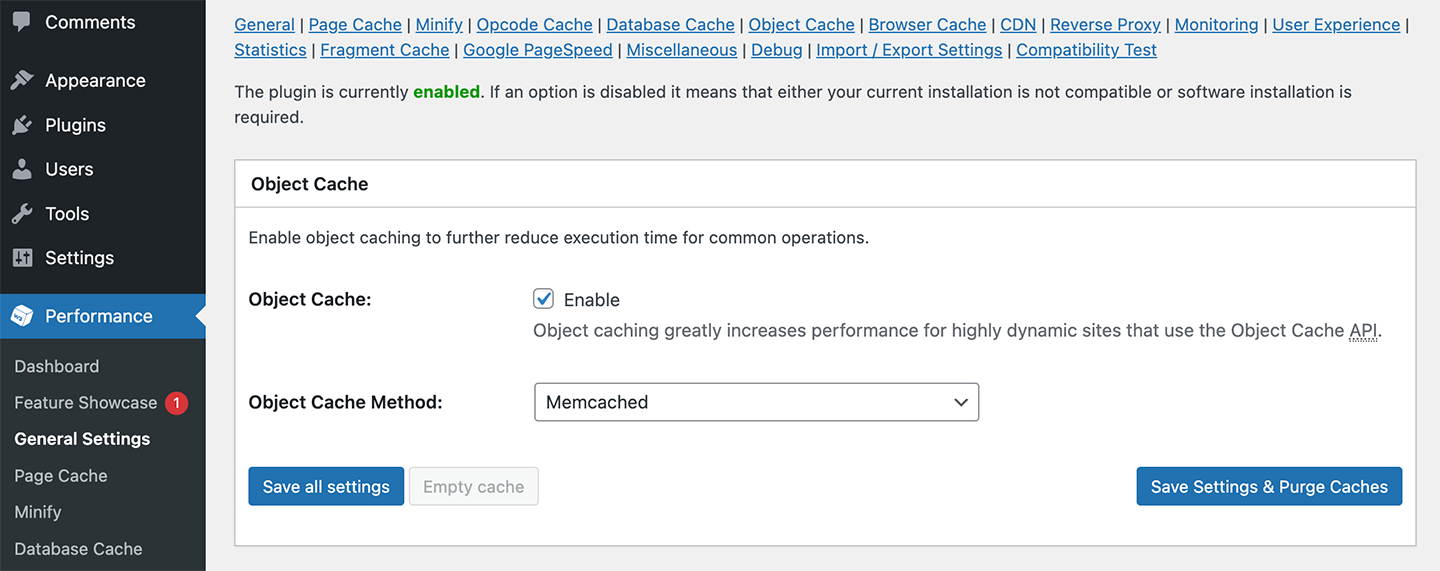
Check the Enable checkbox to enable the object cache. Then, select Memcached and click Save all settings.
You’ll now likely see the following warning:
The following memcached servers are not responding or not running:
Object Cache: 127.0.0.1:11211.
This message will automatically disappear once the issue is resolved.

That warning is because W3 Total Cache is configured by default to look for a Memcached server running on host 127.0.0.1 and port 11211.
Next, to configure your cache, click Performance, then Object Cache.
Under Advanced, enter your MemCachier cache’s server in Memcached hostname:port / IP:port.
Then, enter your MemCachier cache’s username and password in Memcached username and Memcached password, respectively.
Make sure Binary protocol is checked. The binary protocol is required to use SASL authentication with Memcached.

Finally, save the settings.
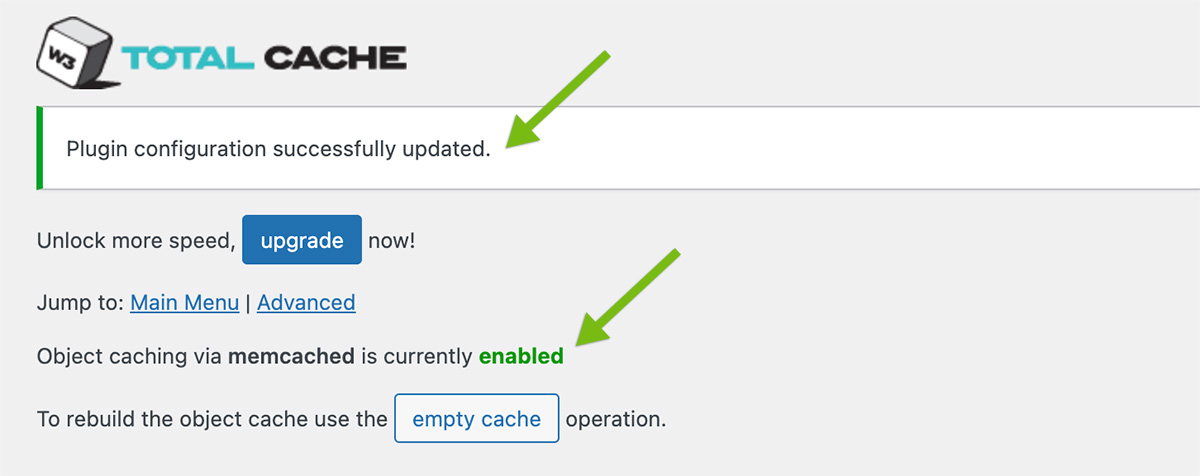
The W3 Total Cache Object Cache is now configured to use MemCachier. You’ll see the following notices at the top of the page:
Plugin configuration successfully updated.
Object caching via memcached is currently enabled
Repeat the same process for any other W3 Total Cache features supporting Memcached: Page Cache, Minify, and Database Cache. The W3 Total Cache Pro Fragment Cache feature also supports Memcached. W3 Total Cache Pro is a paid version of the plugin.
Note that a memcached testing bug was fixed in W3 Total Cache version 2.3.2, released on May 9, 2023.
The bug was related to testing Memcached using SASL authentication and would incorrectly show correctly configured and working caches as not working. When using older versions of the plugin, you will see the following notice after saving settings:
The following memcached servers are not responding or not running:
Object Cache: your_server.memcachier.com:11211.
This message will automatically disappear once the issue is resolved.

Also, due to the same bug, if you clicked the Test button beside Memcached hostname:port / IP:port, you would get an error notification, Test Failed.
Update the W3 Total Cache plugin to the latest version, and those errors will disappear.
Check Memcached is working
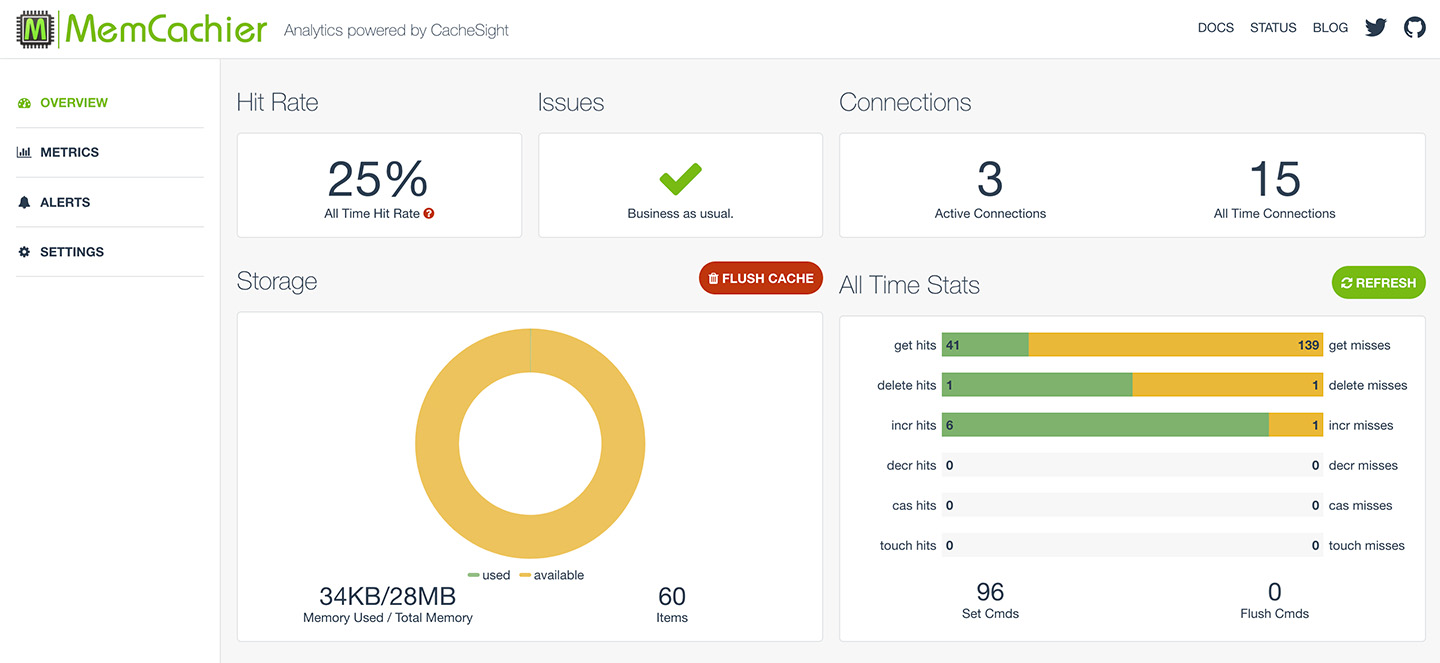
To verify your cache is working, check your MemCachier analytics dashboard. To open the analytics dashboard, go to your Add-Ons dashboard and click View MemCachier under Dashboard Link.

Notice the stats change when you refresh your WordPress website. On the All Time Stats card, you’ll see misses increase initially as items are missed, then stored in your cache. Then, you’ll see hits increase as those items are served from the cache.
The MemCachier analytics dashboard displays your cache’s statistics so you can monitor performance and troubleshoot issues quickly and easily.
Conclusion
You now have a WordPress website installed on a DigitalOcean 1-Click Droplet with optimized performance thanks to the W3 Total Cache plugin and Memcached.
A 1-Click Droplet is the easiest way to install WordPress on DigitalOcean. MemCachier offers the quickest and easiest way to set up a Memcached cache on DigitalOcean while providing speedy performance and high availability. With a DigitalOcean 1-Click Droplet, W3 Total Cache, and MemCachier, you have a powerful combination to take your WordPress performance to the next level.