New API for the Analytics Dashboard Features
 Lindsey
~ October 10, 2017
Lindsey
~ October 10, 2017
This week we exposed the API feeding our analytics dashboard so you can hook into some of its more convenient features. With our new public API, you can retrieve statistics and historical data to analyze your cache’s activity. You’ll be able to add, edit, promote, and delete credentials. You’ll also have the option to trigger a cache flush command via the API. This means you can now integrate your cache into other processes, such as setting up an HTTP deploy hook through Heroku. Let’s walk through what that would look like.
Say you’ve got a staging environment on Heroku. Due to the temporary nature of staging environments, test data has a tendency to become stale quickly. Chances are you’ll end up with a bunch of leftover cruft in your cache that you don’t need, don’t want, and that makes it difficult to effectively test your site. No problem. We’ll set up an HTTP deploy hook that will flush your cache automatically with each deploy so that your cache is clean and ready to go.
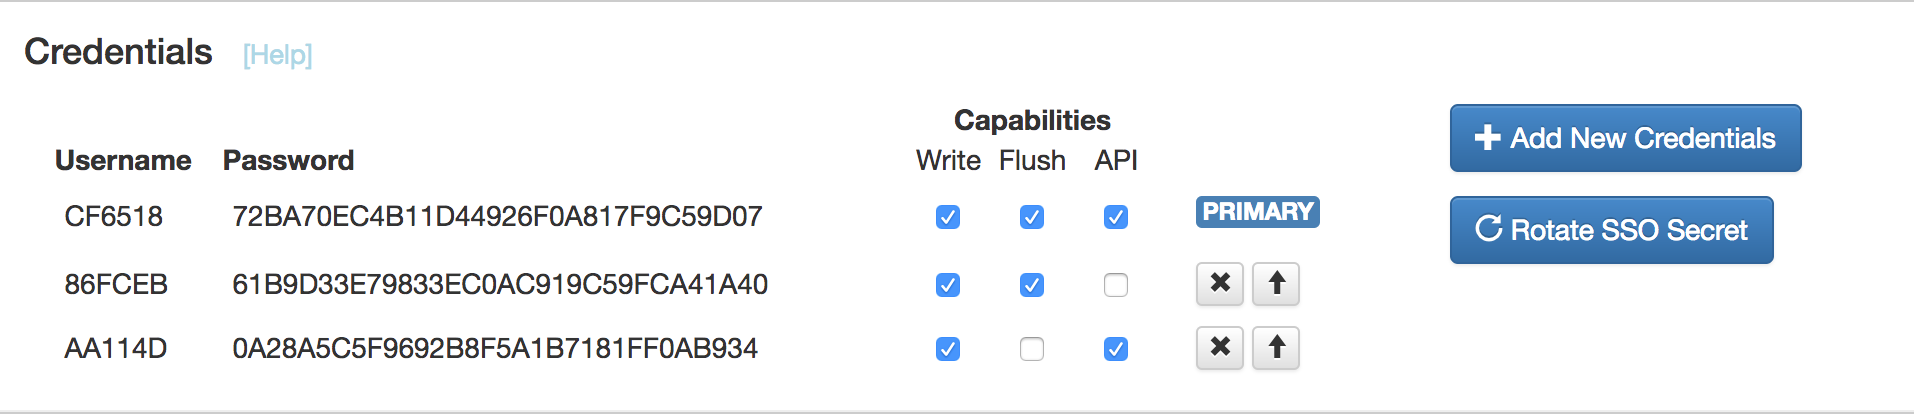
The first thing you’ll need is a set of MemCachier credentials that have API capabilities. On the analytics dashboard for your cache, you’ll notice an additional checkbox next to each set of credentials labeled “API”. This tells you whether or not that particular set of credentials is allowed to operate the API.
Now that we have the necessary authorization information, we’ll find your MemCachier API ID. (Your MemCachier API ID is not the same number listed under the settings section of the analytics dashboard.) You’ll need to retrieve it via the API:
$ curl "https://analytics.memcachier.com/api/v1/login" \
> --user "9D8D3F:DEDF58E7704AC284E5B92F4B87B8A2DB"
Your payload should look something like this:
{
  "cache_id": 123456
}
Now we can access all of the fun stuff the API has to offer. For kicks, let’s check out the list of credentials available for this cache:
$ curl "https://analytics.memcachier.com/api/v1/123456/credentials" \
> --user "9D8D3F:DEDF58E7704AC284E5B92F4B87B8A2DB"
[{
  "uuid": null,
  "flush_capability": true,
  "cache_id": 253499,
  "sasl_username": "9D8D3F",
  "api_capability": true,
  "write_capability": true,
  "id": 247459
 },{
  "uuid": null,
  "flush_capability": true,
  "cache_id": 253499,
  "sasl_username": "AA5930",
  "api_capability": true,
  "write_capability": true,
  "id": 248867
}]
Alright, now back to the task at hand. For our deploy hook to successfully run a flush command via the API, we’ll need a set of credentials that has both API capabilities and flush capabilities. Once you have your selected set of credentials, we’ll authenticate the API call by including the credential username and password at the beginning of your HTTP URL. You can find more information about setting up a Heroku deploy hook in the Heroku Dev Center.
$ heroku addons:create deployhooks:http \
> --url="https://9D8D3F:DEDF58E7704AC284E5B92F4B87B8A2DB@\
> analytics.memcachier.com/api/v1/253499/flush"
And that’s it! Pretty simple. Now, anytime you deploy a new branch to the heroku master, your cache will automatically flush all of that unnecessary old data away allowing you to run tests on data that’s new and relevant. Just keep in mind that if you ever update or delete that set of credentials, you’ll need to manually update your deploy hook as well.
If you’re curious about all the other functionality our API has to offer, you can find the full documentation for it on our documentation page